[EN] Security Operation Center Setup
Hi everyone! In this article, I will take you through my Security Operation Center environment on Hetzner, which is a German company that provides web hosting services and data centers.
I want to start by sharing my excitement with you.
I have been interested in IT for some time and have built several lab environments, ranging from small to large. After gaining experience, I wanted to build my own SOC environment to gain more real-life experience.
I have learned many things that have sharpened my knowledge significantly. I will maintain this project as long as possible and share my experiences with you by writing new articles about it. My aim here is to defend, gain experience, and learn new things as much as possible.
I’m writing this article as a guide for those who want to build their own lab environment and gain real-life experience.
I have been planning this project for some time, and after extensive research, I created a proper lab topology as you can see below.
Topology
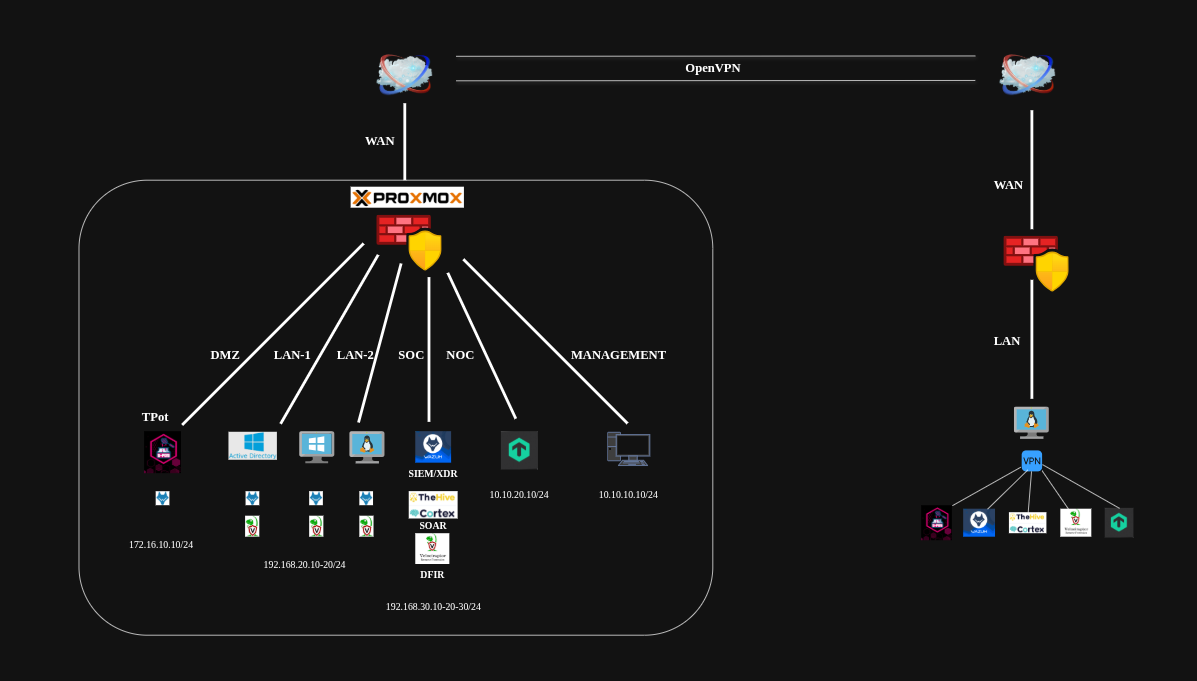
Hetzner Dedicated Server
I will be using Hetzner as my cloud provider, which is among the best and has a solid, secure infrastructure with affordable costs.
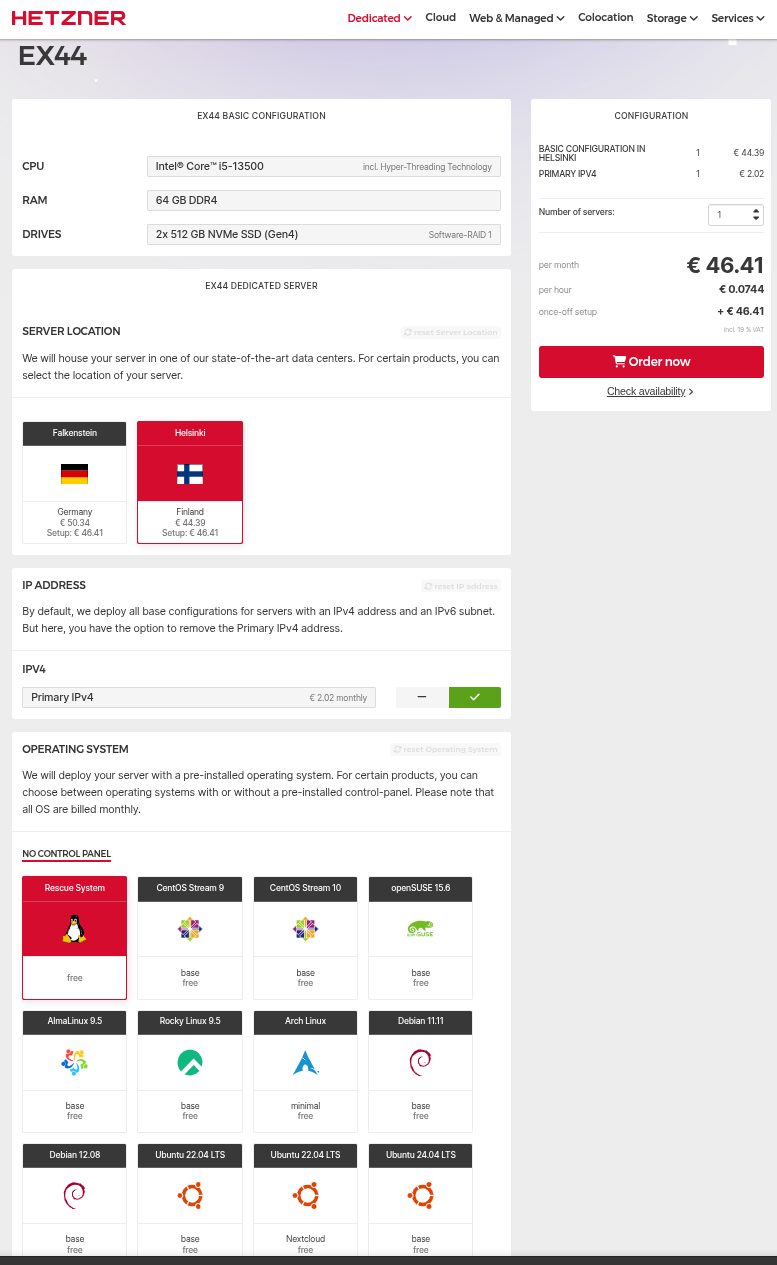
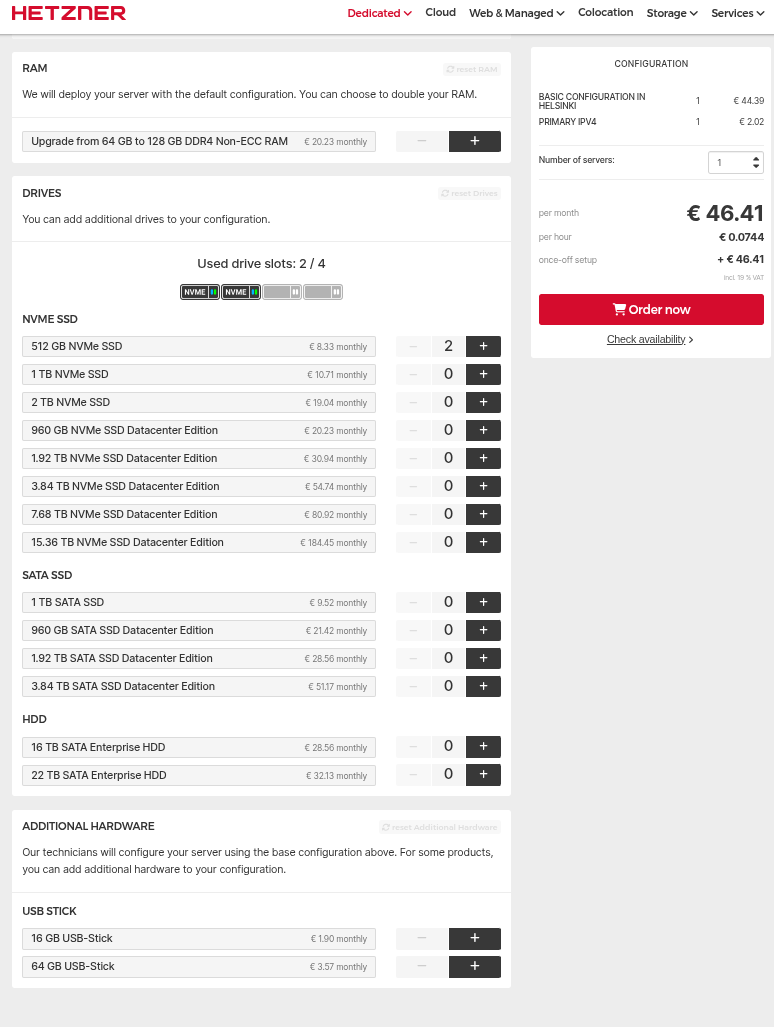
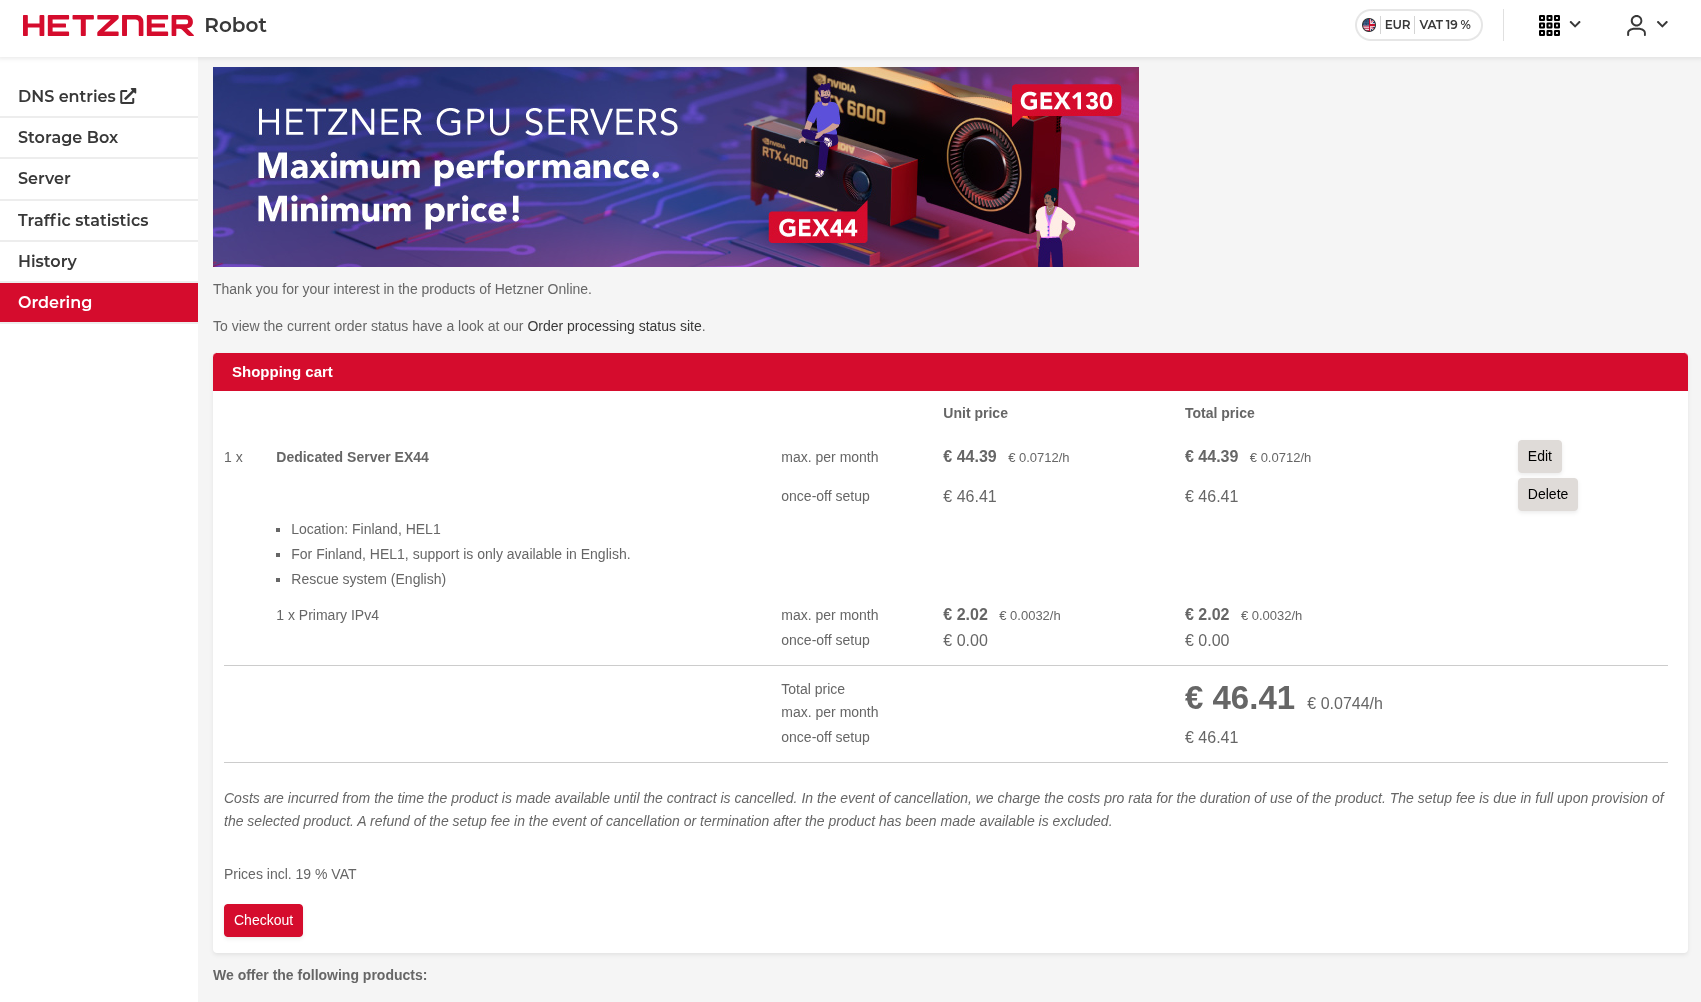
I purchased the “EX44” model dedicated server, which is sufficient to build your own SOC if you don’t need a large one. In my case, it is more than adequate.
Here are the server model and its features.
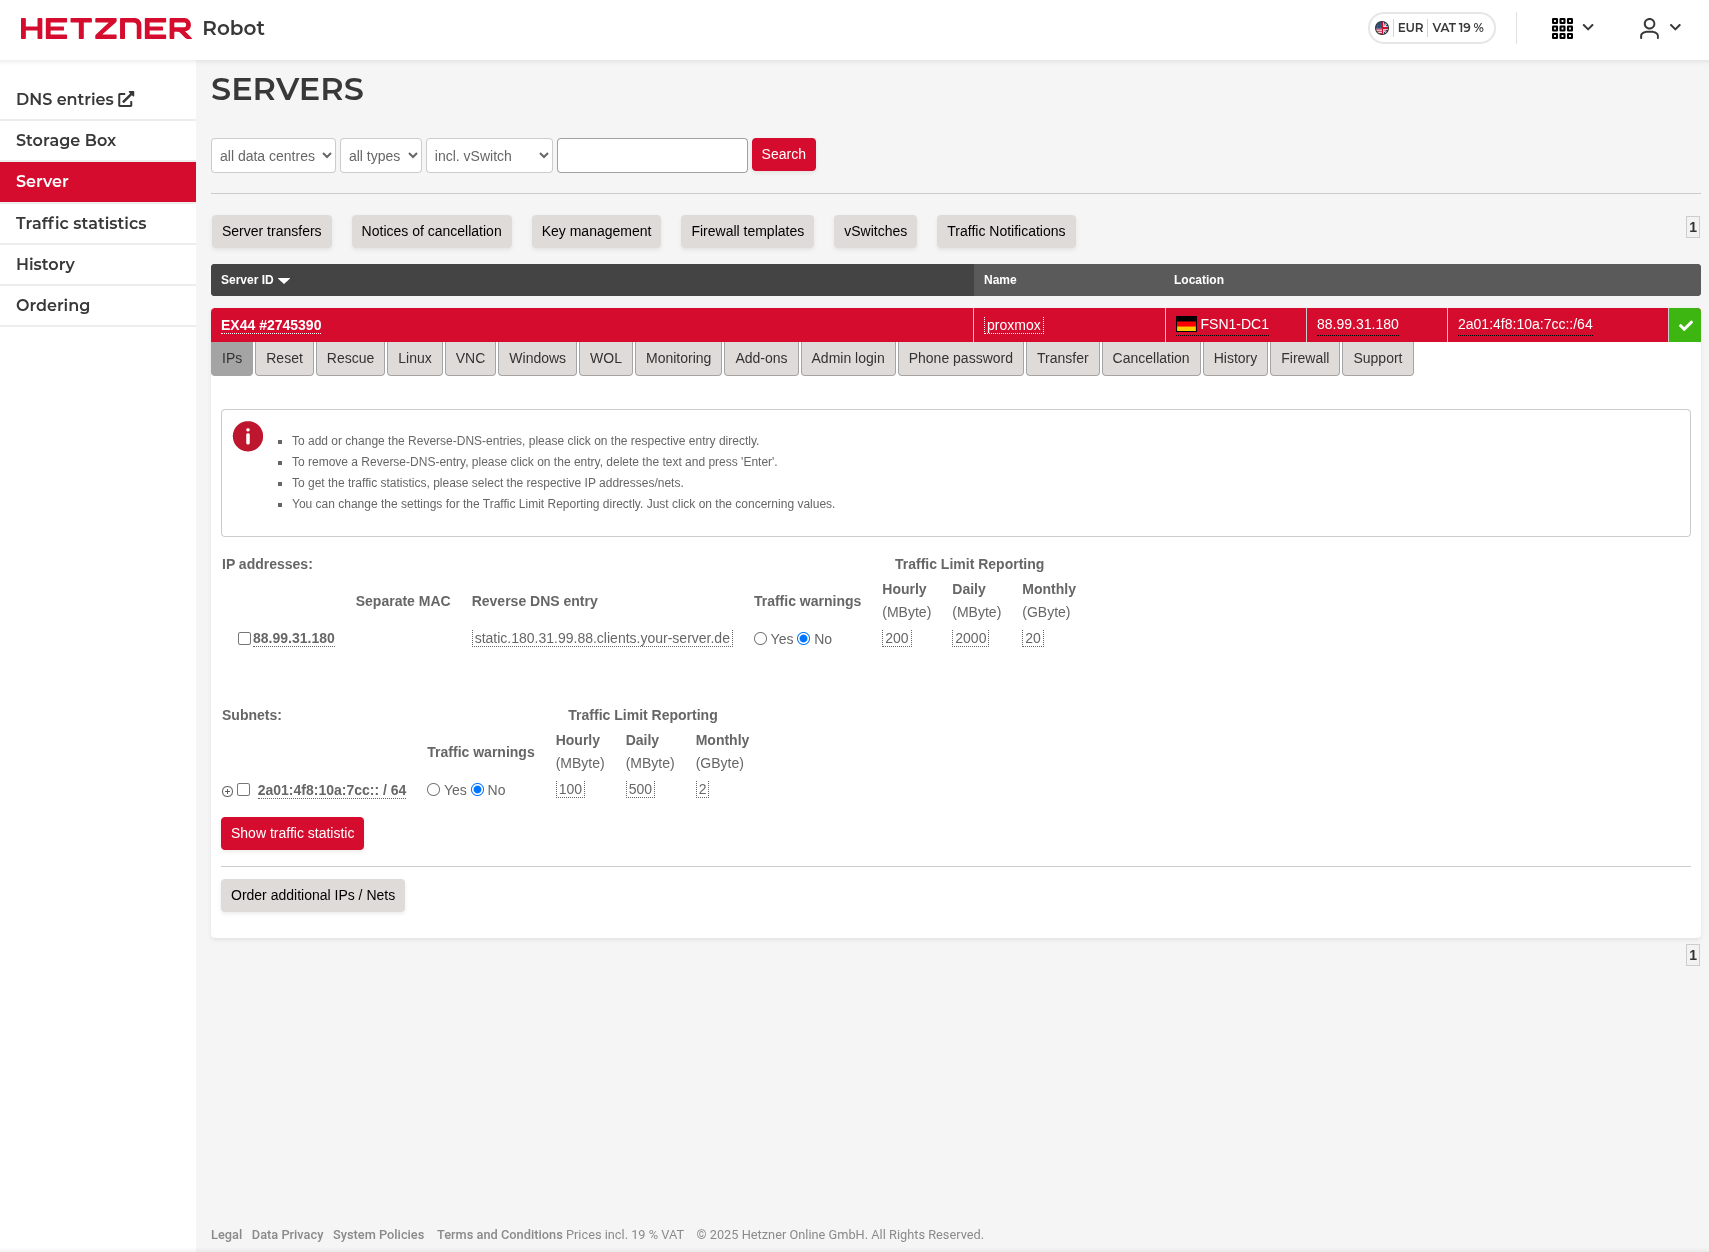
Additional IP
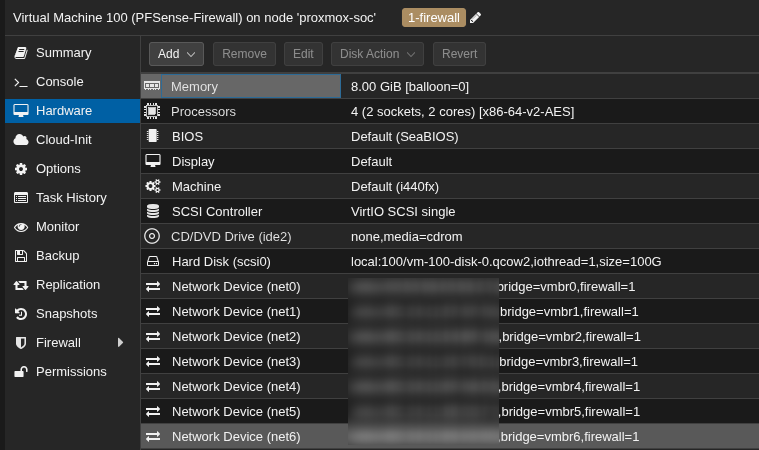
I will install virtualization software on this dedicated server and then install a firewall solution on it. Therefore, I need 2 public IP addresses. I already have one that is included in the dedicated server price, but I need a second one for the firewall’s WAN side.
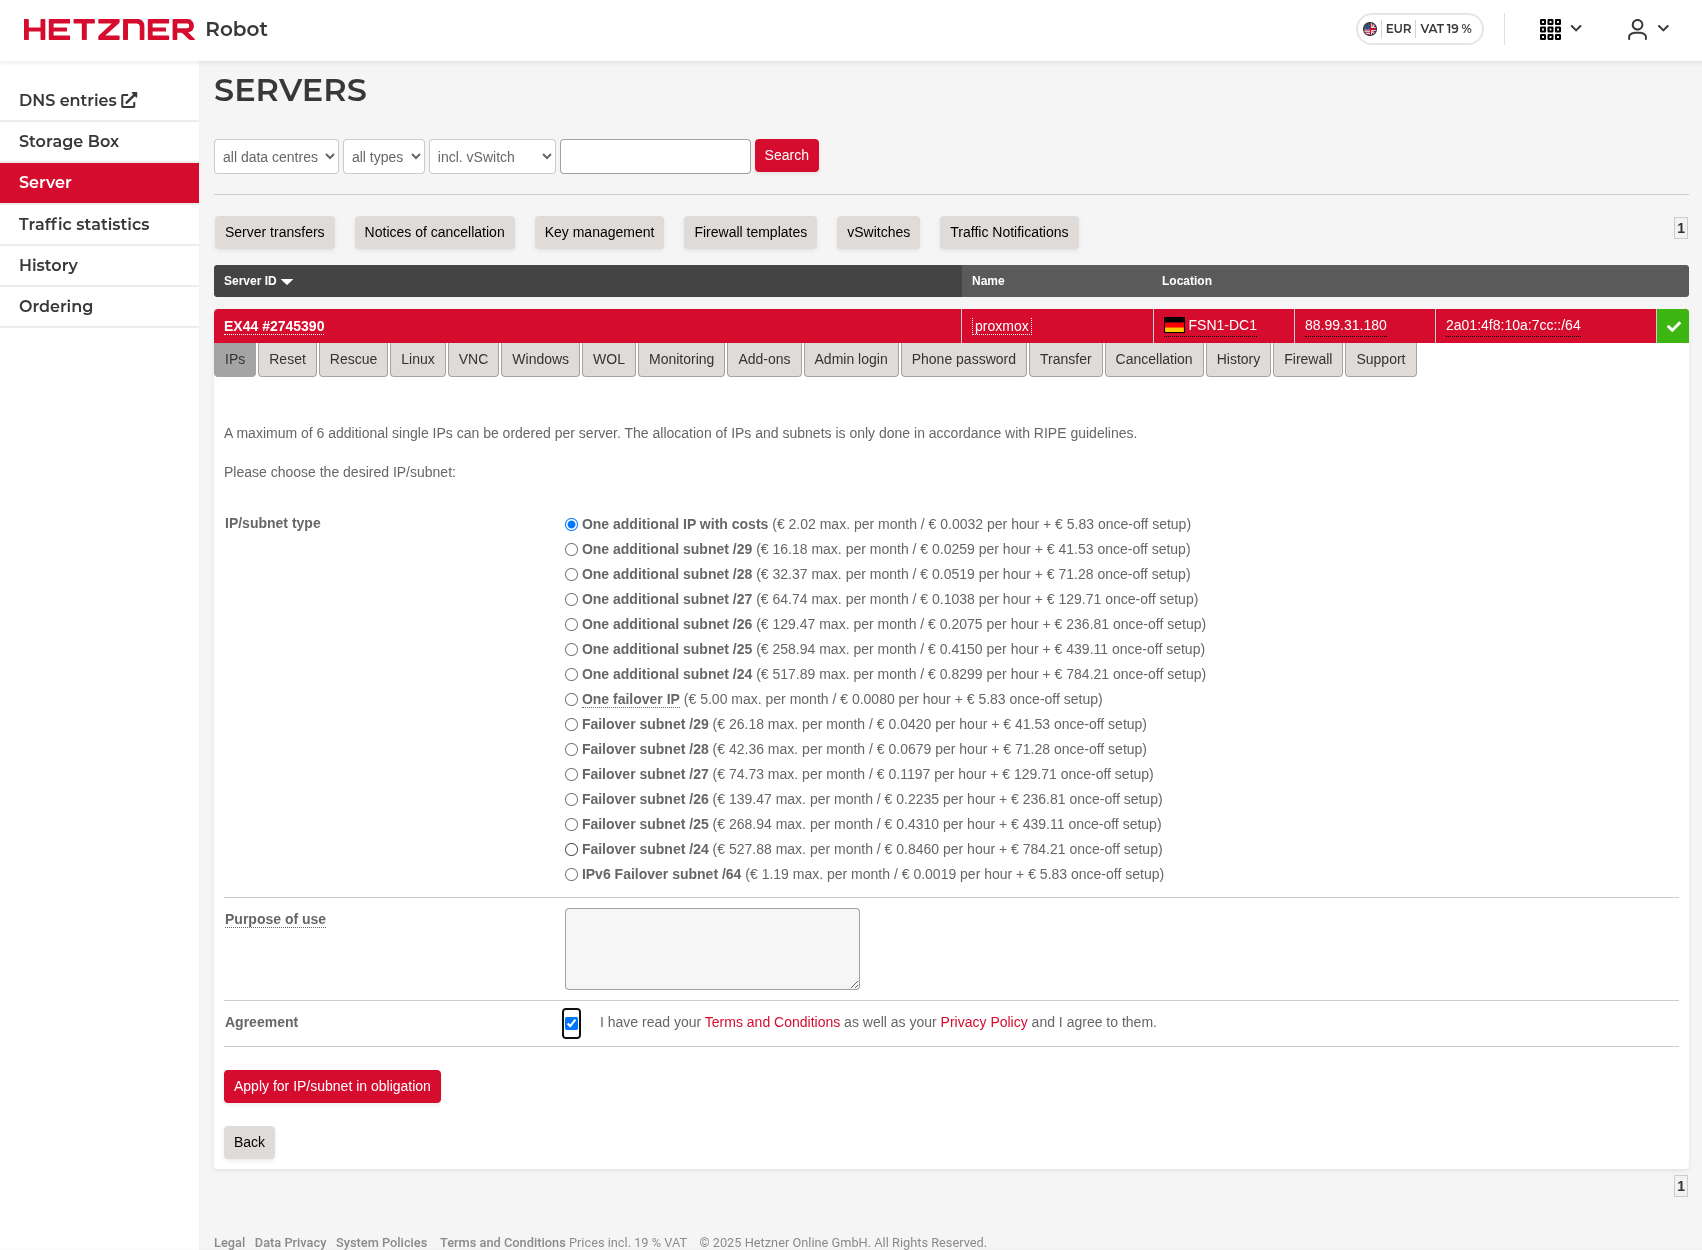
Here’s how to purchase an additional public IP address.
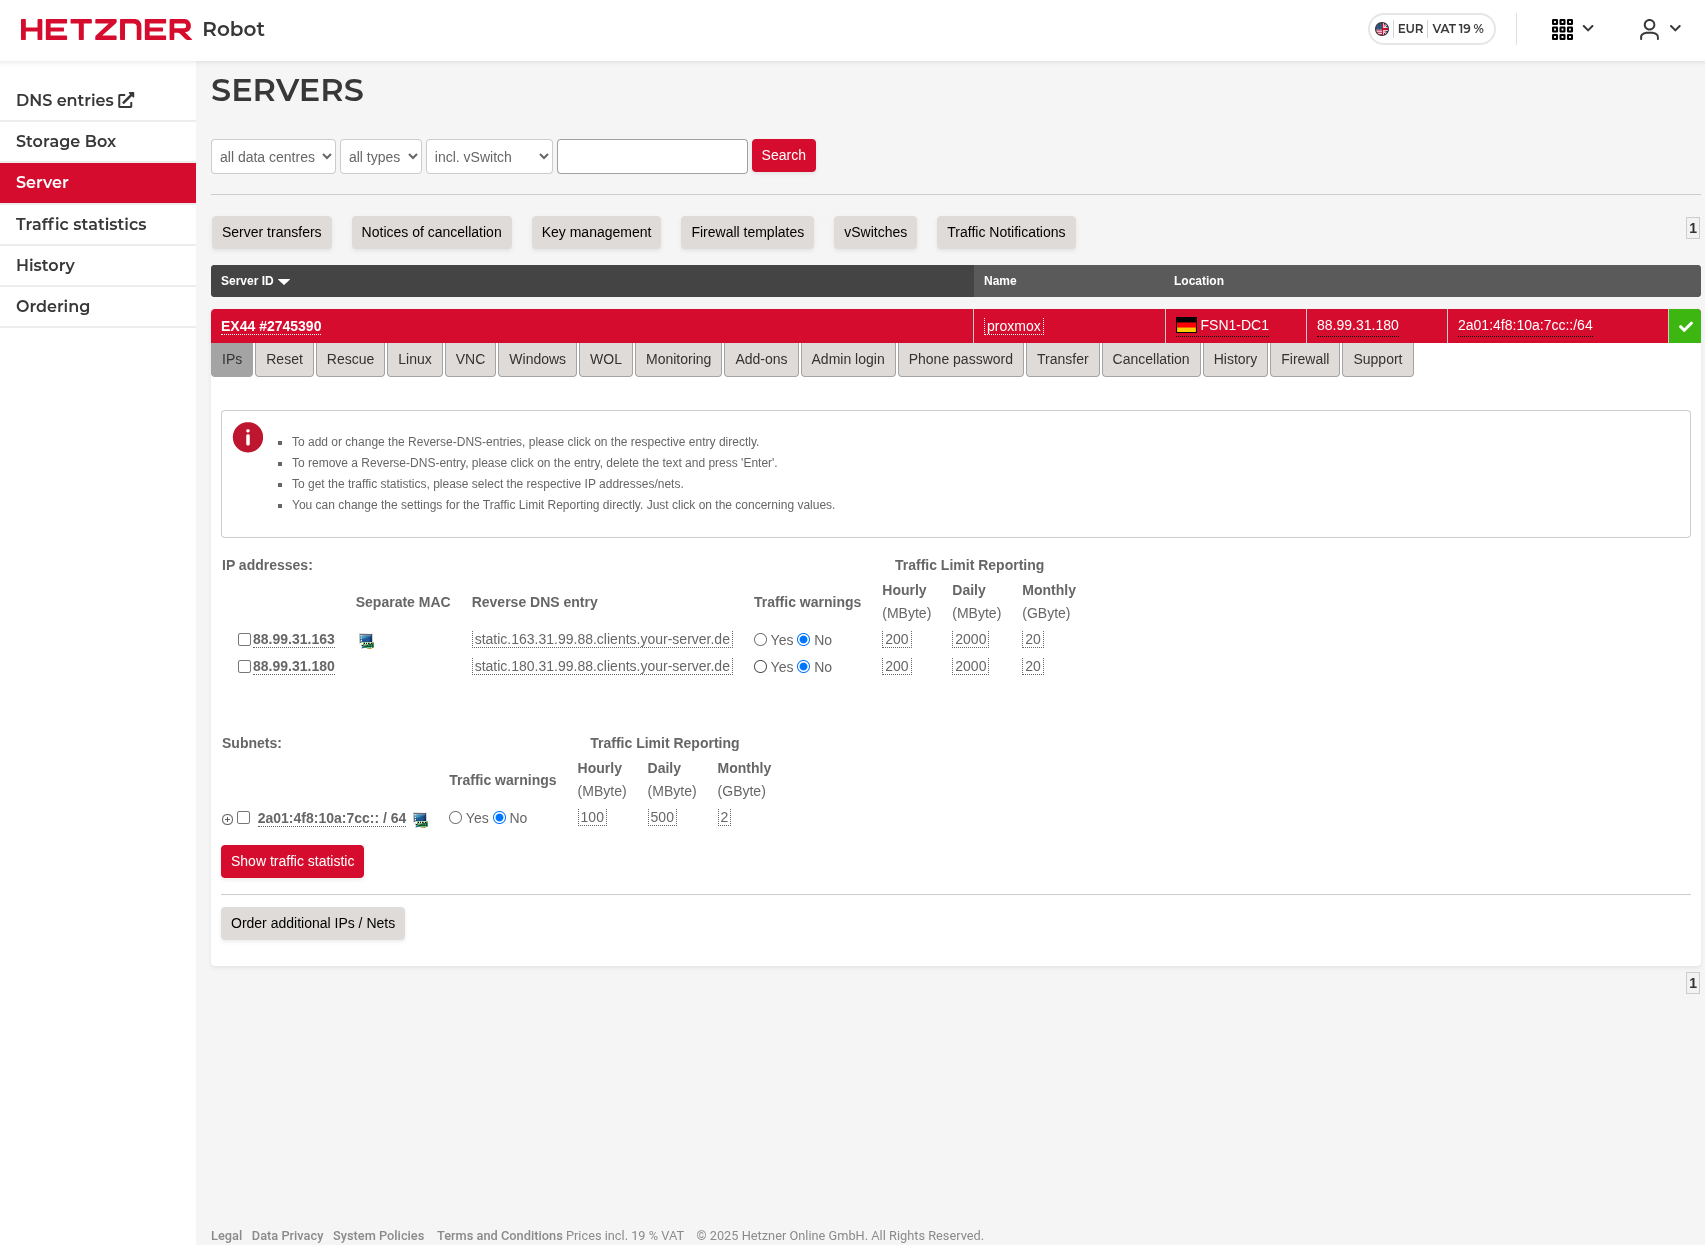
After purchasing the additional IP address, we need to separate their MAC addresses.
As you can see in the image below, there is a PC icon next to the additional IP address. Click that icon to separate the MAC addresses.
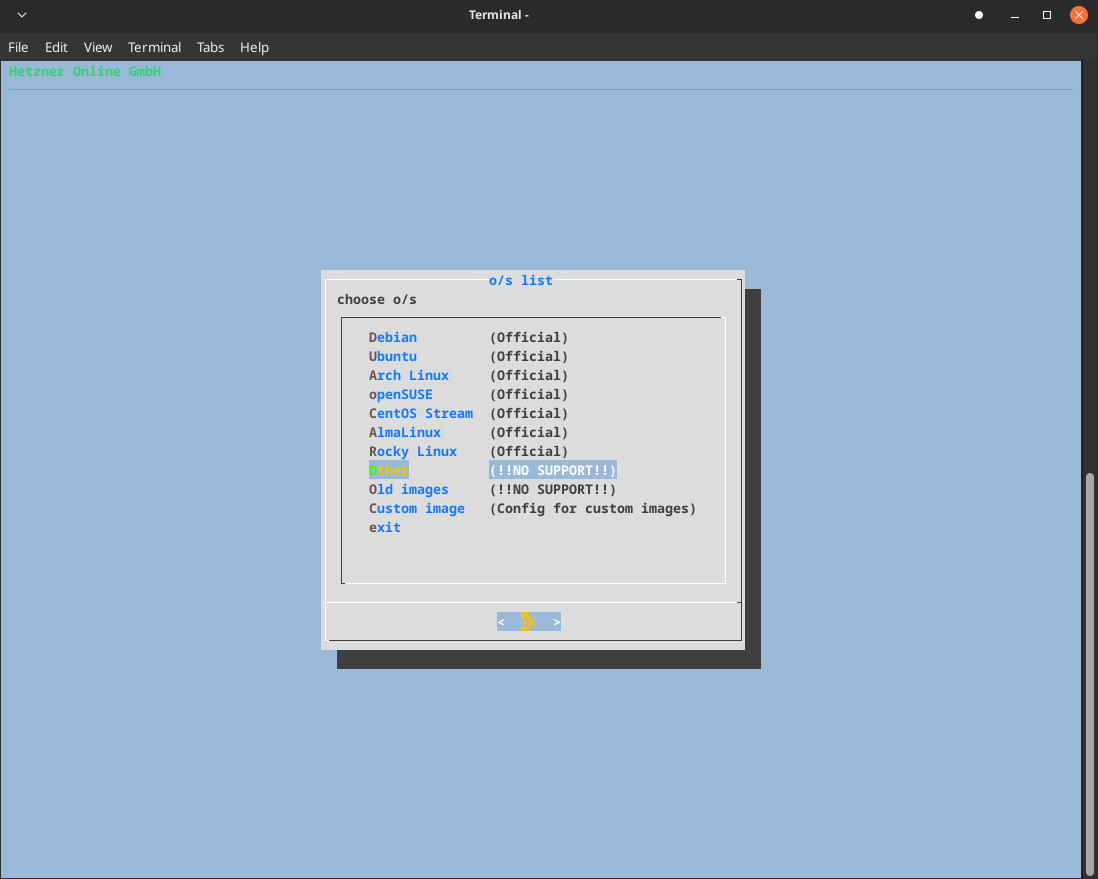
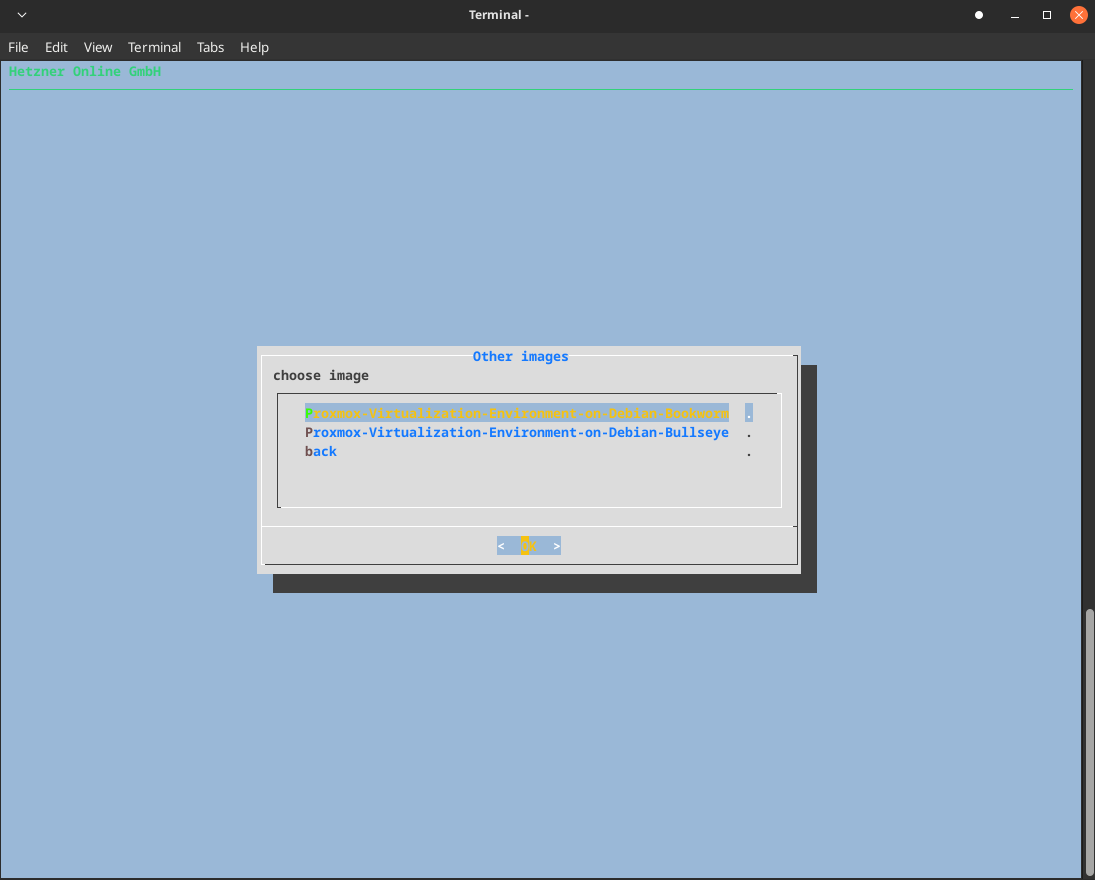
Proxmox Installation
Now, it’s time to install Proxmox on our server.
I’m including some articles below that will help you if you get stuck.
https://community.hetzner.com/tutorials/install-and-configure-proxmox_ve
https://medium.com/@artem_lajko/setup-ve-with-proxmox-on-hetzner-single-mode-6b76061efcdb
Here is how I did it.
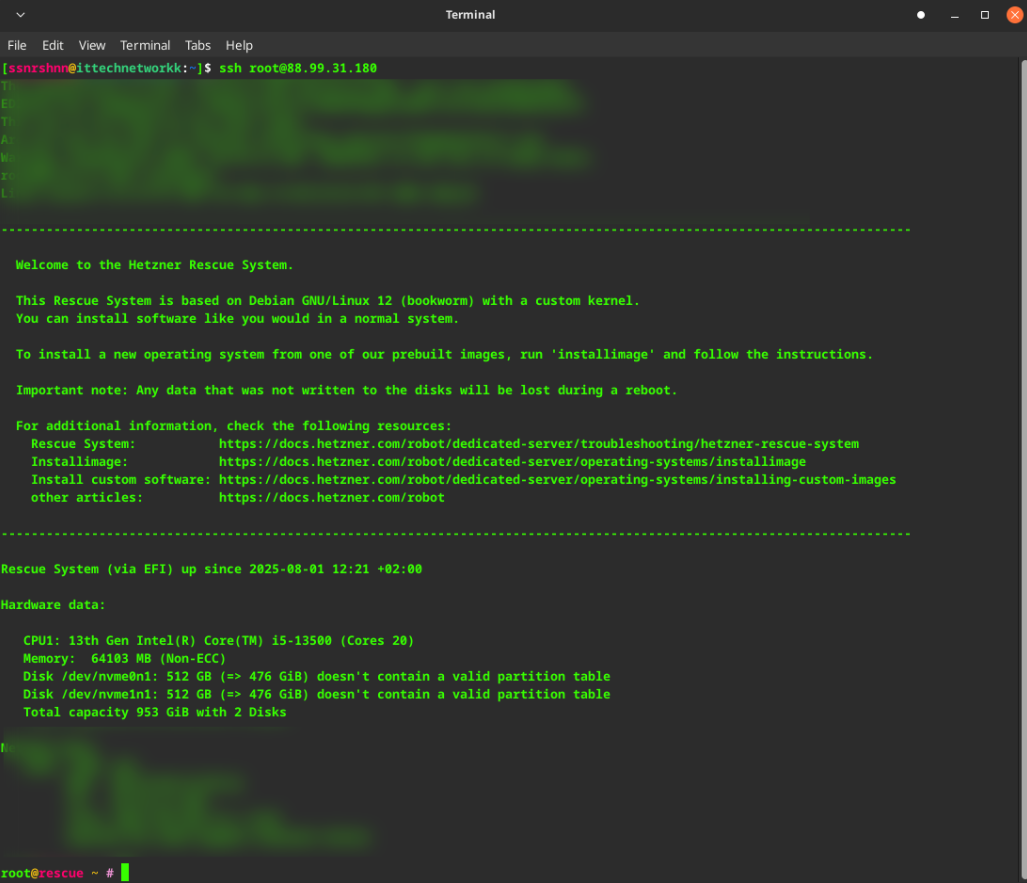
Once the ordering process is complete, you will be sent the server information that will allow you to SSH. Keep the credentials safe.
SSH Connection
Connect to the server via SSH to install Proxmox.
1installimage
1SWRAIDLEVEL 0
Note: SWRAIDLEVEL 0 creates a striped RAID configuration without redundancy. This provides maximum performance but no fault tolerance. For production environments, consider using RAID 1 or RAID 5 for better data protection.
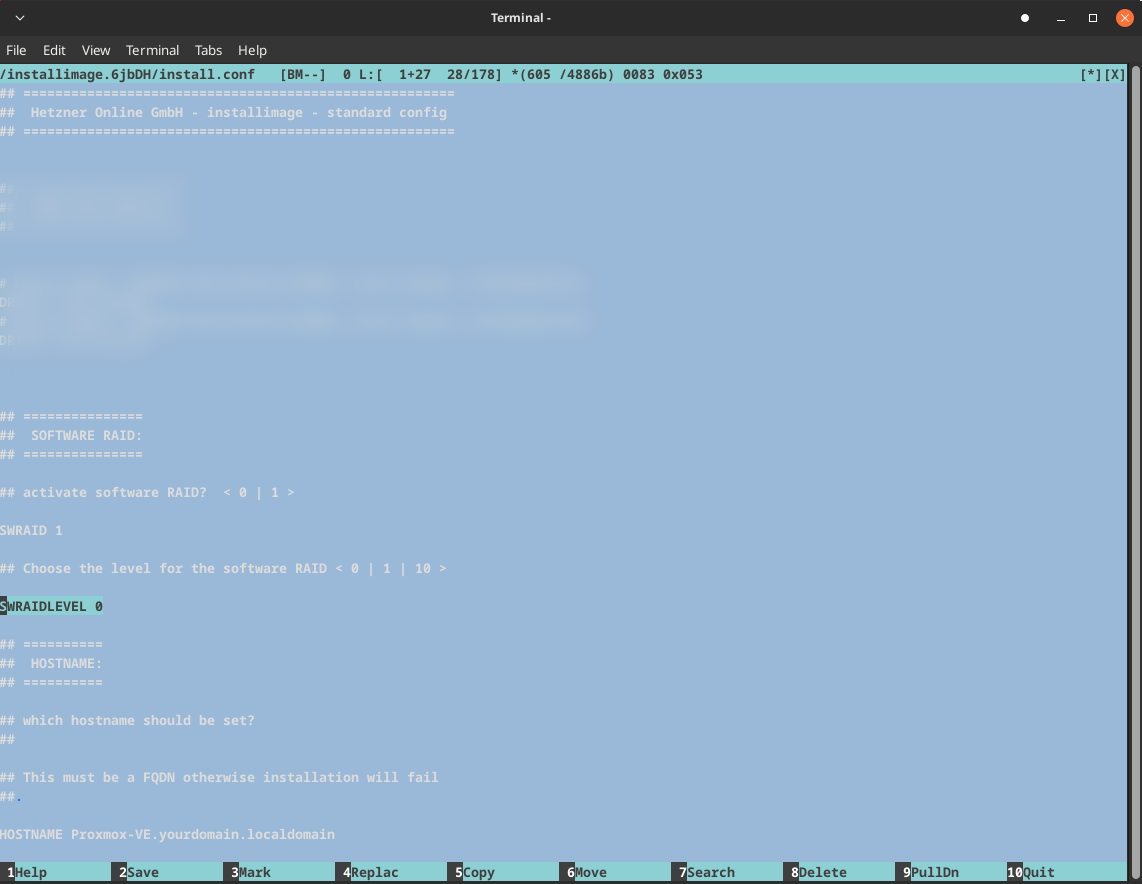
1HOSTNAME proxmox-soc.local
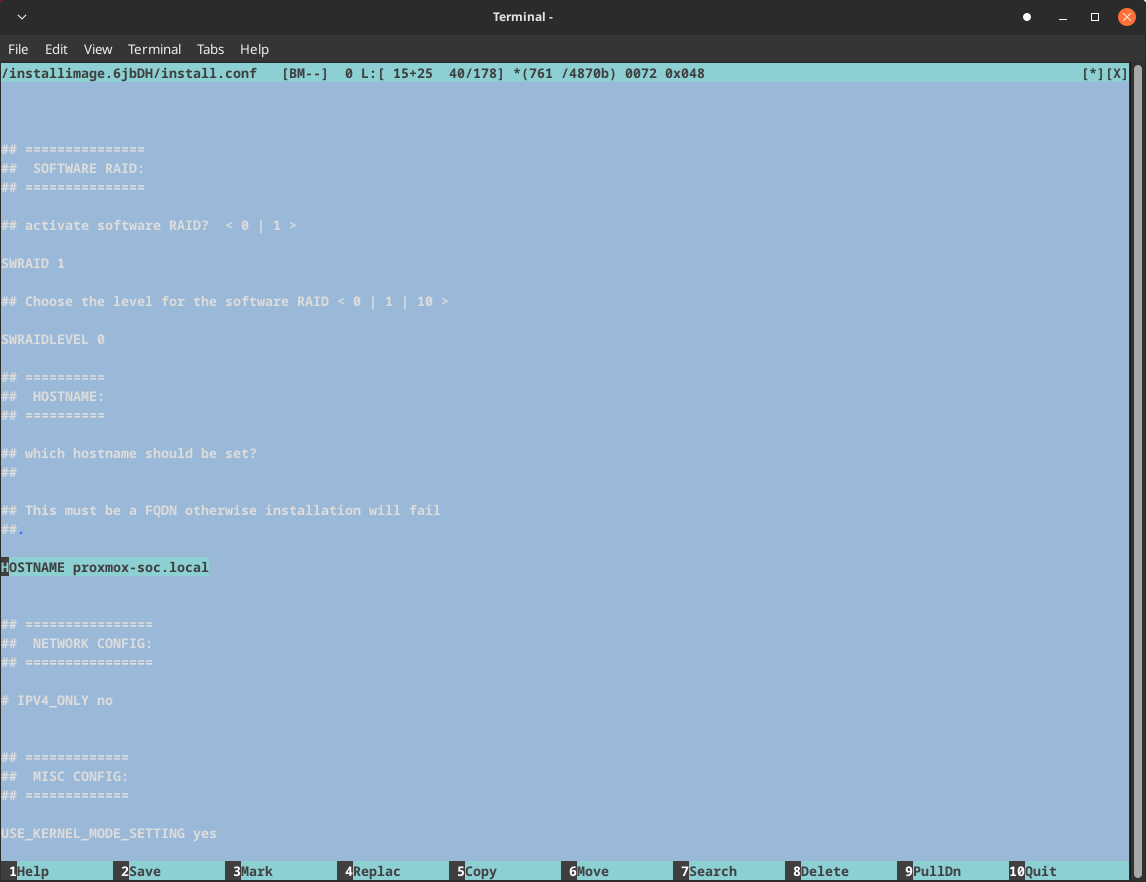
1IPV4_ONLY yes
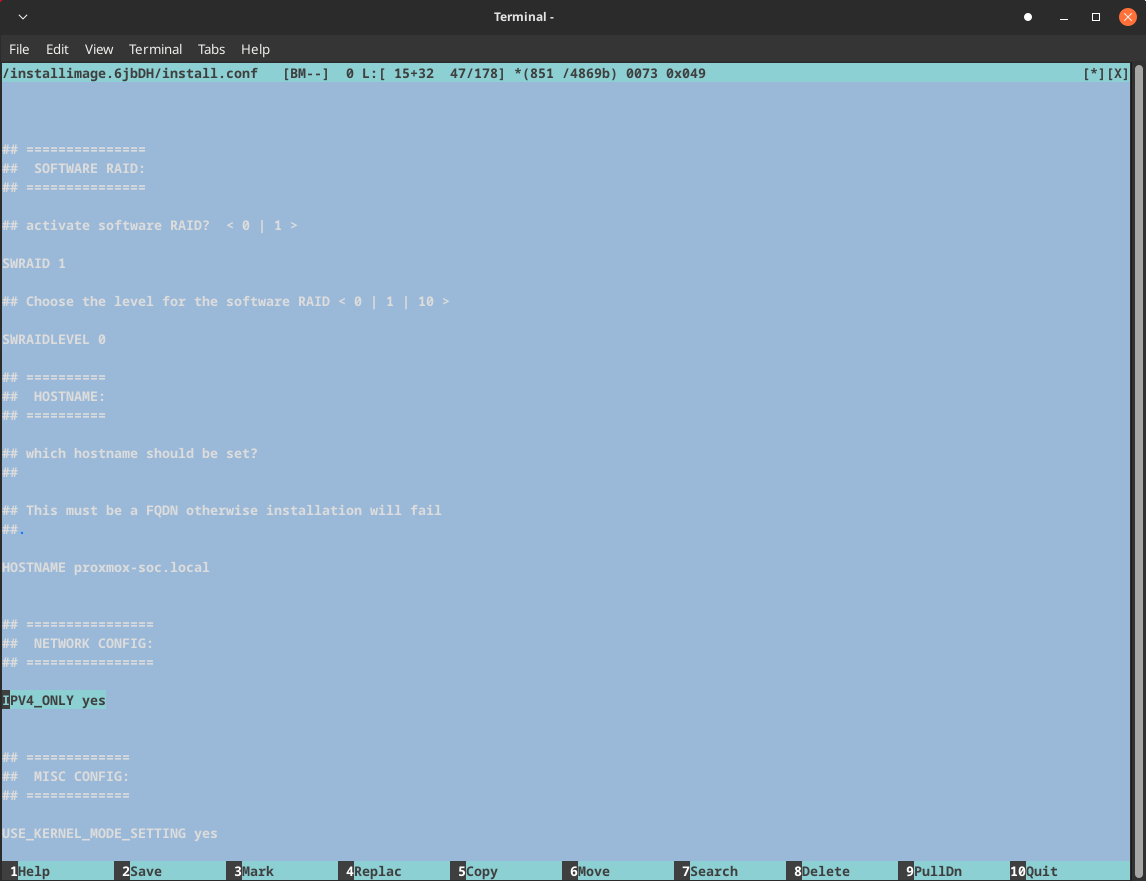
Partitioning

Save and quit.
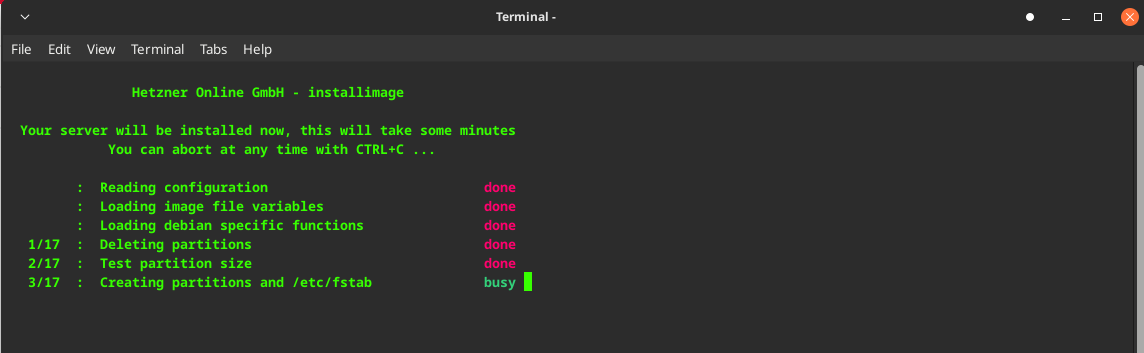
If everything is correct, you will be taken to a screen like the following.
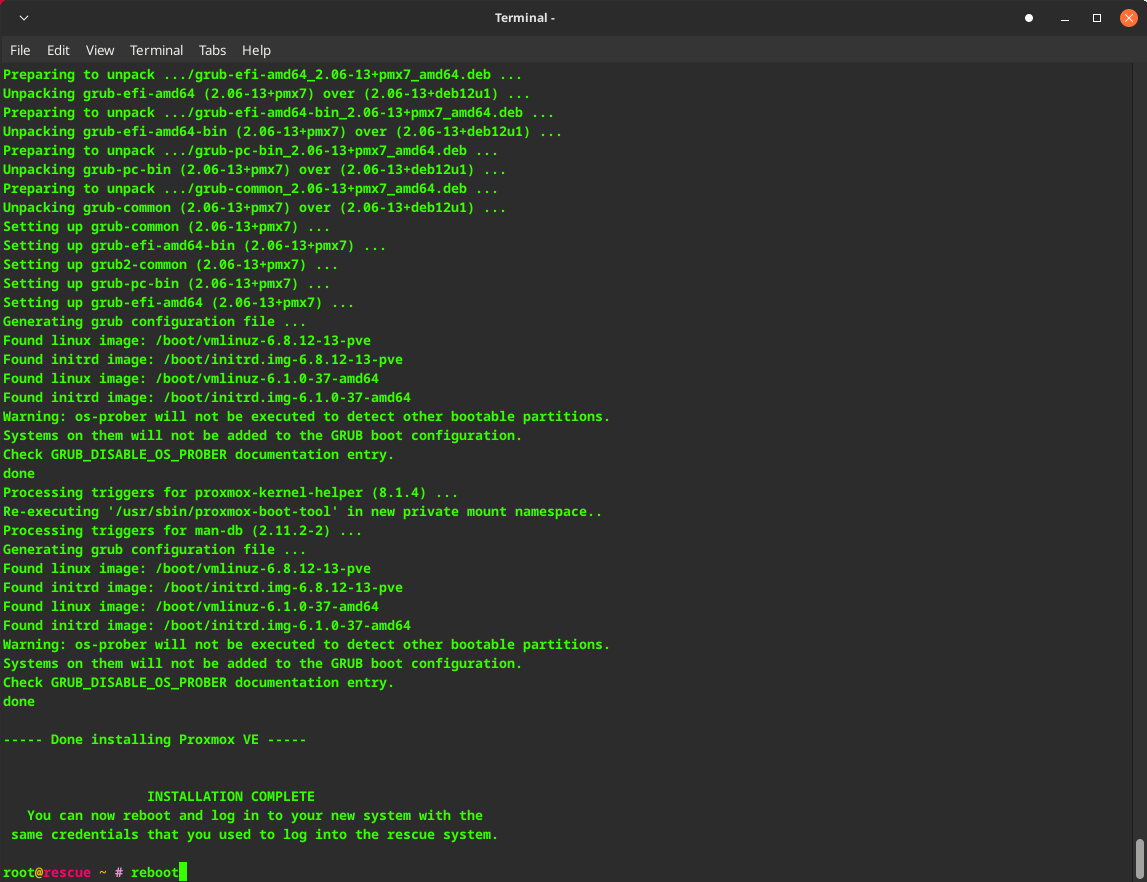
Once the installation is complete, reboot the server and wait a couple of minutes.
Then navigate to your IP address and the relevant port for Proxmox, which is 8006 by default.
Here is Proxmox successfully installed.
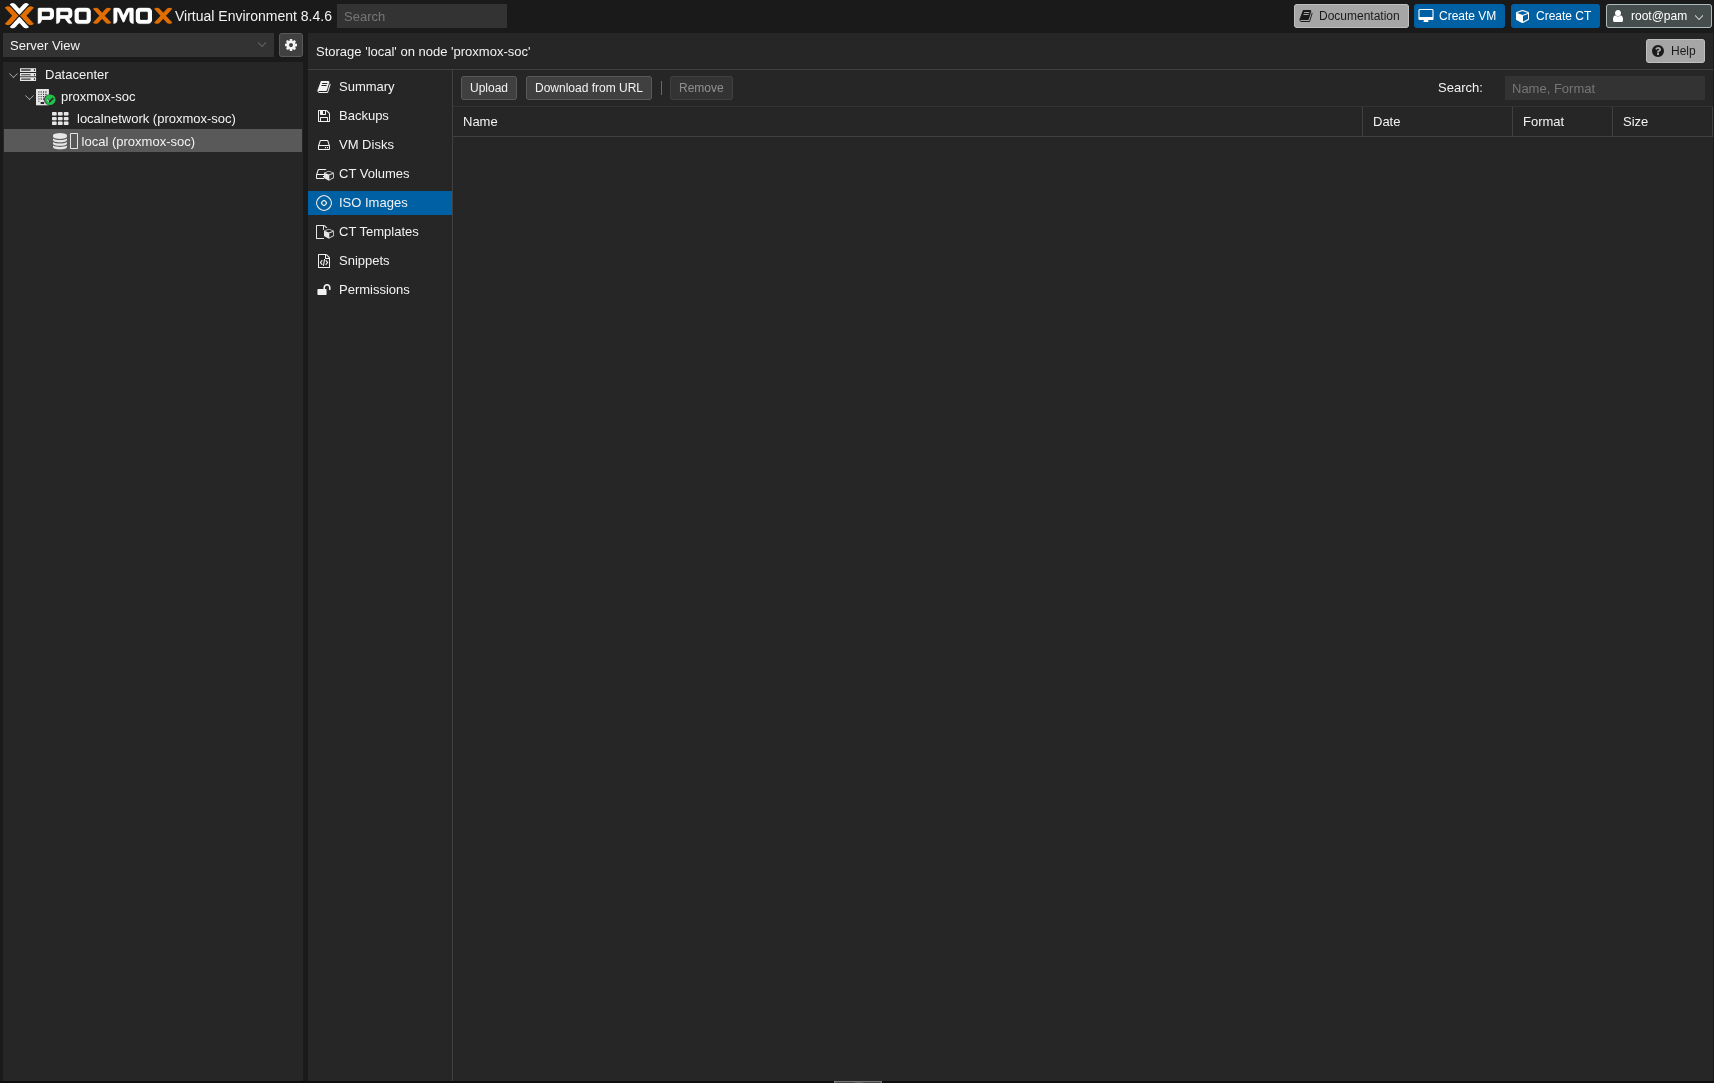
Here you can upload the ISO images you plan to use.
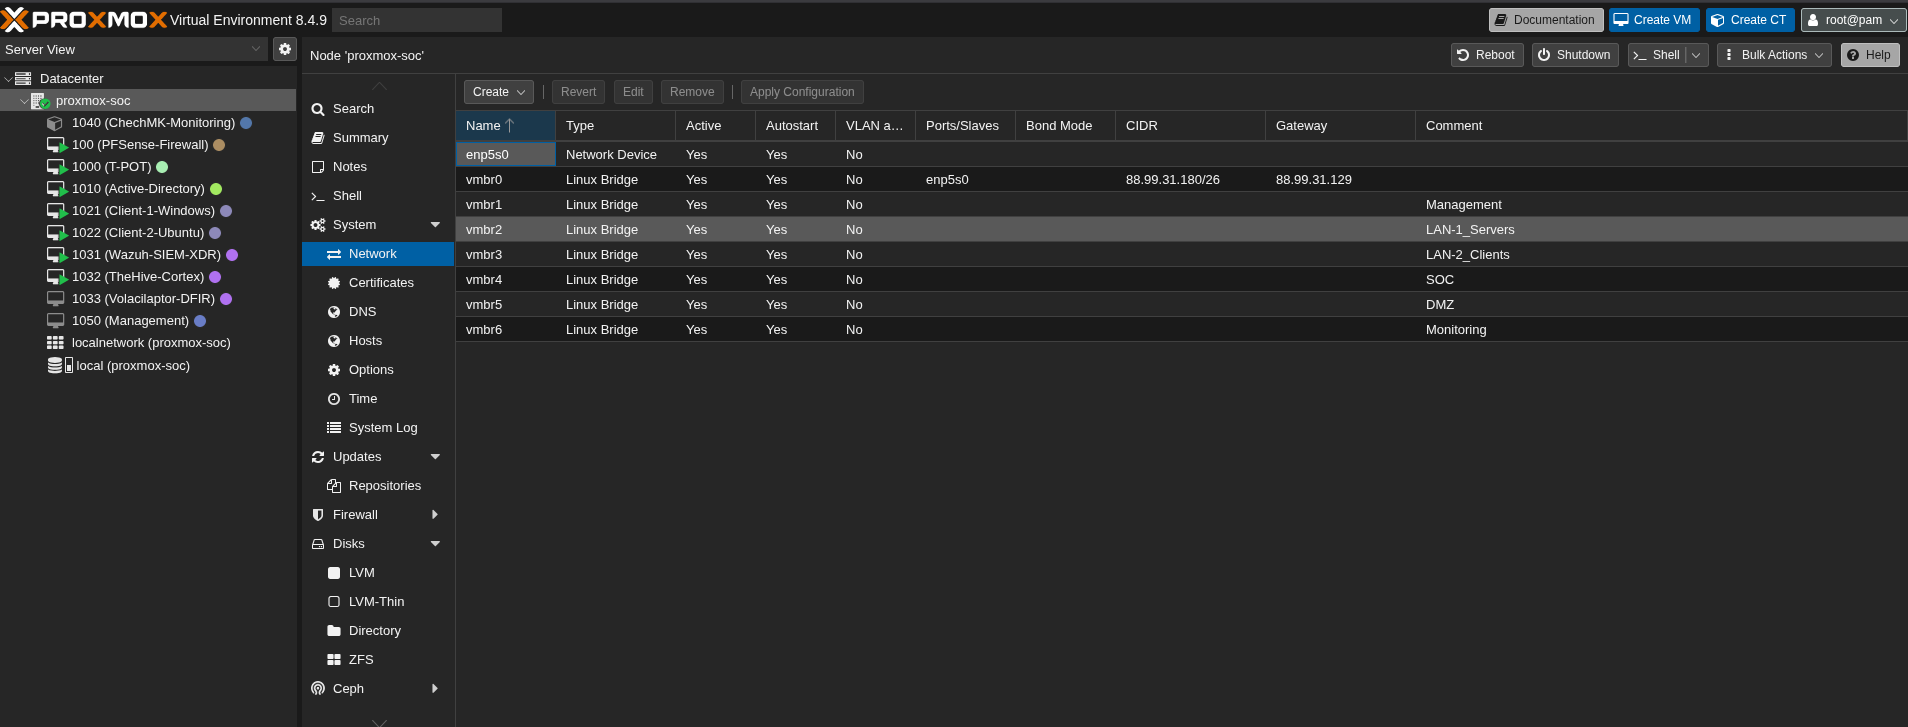
Network Configuration
Here is the network configuration of my Proxmox server. I’ve created multiple network bridges to segment different network zones:
- vmbr0: WAN interface (connected to the internet)
- vmbr1: Management network (for Proxmox administration)
- vmbr2: LAN-1 for servers
- vmbr3: LAN-2 for client machines
- vmbr4: SOC network (Security Operations Center)
- vmbr5: DMZ network (Demilitarized Zone)
- vmbr6: Monitoring network
 1root@proxmox-soc ~ # cat /etc/network/interfaces
 2# network interface settings; autogenerated
 3# Please do NOT modify this file directly, unless you know what
 4# you're doing.
 5#
 6# If you want to manage parts of the network configuration manually,
 7# please utilize the 'source' or 'source-directory' directives to do
 8# so.
 9# PVE will preserve these directives, but will NOT read its network
10# configuration from sourced files, so do not attempt to move any of
11# the PVE managed interfaces into external files!
12
13source /etc/network/interfaces.d/*
14
15auto lo
16iface lo inet loopback
17
18iface lo inet6 loopback
19
20auto enp5s0
21iface enp5s0 inet manual
22
23auto vmbr0
24iface vmbr0 inet static
25        address 88.99.31.180/26
26        gateway 88.99.31.129
27        bridge-ports enp5s0
28        bridge-stp off
29        bridge-fd 0
30
31auto vmbr1
32iface vmbr1 inet manual
33        bridge-ports none
34        bridge-stp off
35        bridge-fd 0
36#Management
37
38auto vmbr2
39iface vmbr2 inet manual
40        bridge-ports none
41        bridge-stp off
42        bridge-fd 0
43#LAN-1_Servers
44
45auto vmbr3
46iface vmbr3 inet manual
47        bridge-ports none
48        bridge-stp off
49        bridge-fd 0
50#LAN-2_Clients
51
52auto vmbr4
53iface vmbr4 inet manual
54        bridge-ports none
55        bridge-stp off
56        bridge-fd 0
57#SOC
58
59auto vmbr5
60iface vmbr5 inet manual
61        bridge-ports none
62        bridge-stp off
63        bridge-fd 0
64#DMZ
65
66auto vmbr6
67iface vmbr6 inet manual
68        bridge-ports none
69        bridge-stp off
70        bridge-fd 0
71#Monitoring
Pfsense Network Configuration:
The pfSense firewall acts as the gateway between your internal networks and the internet. It’s crucial to properly configure the network interfaces to ensure traffic flows correctly between your different network segments.
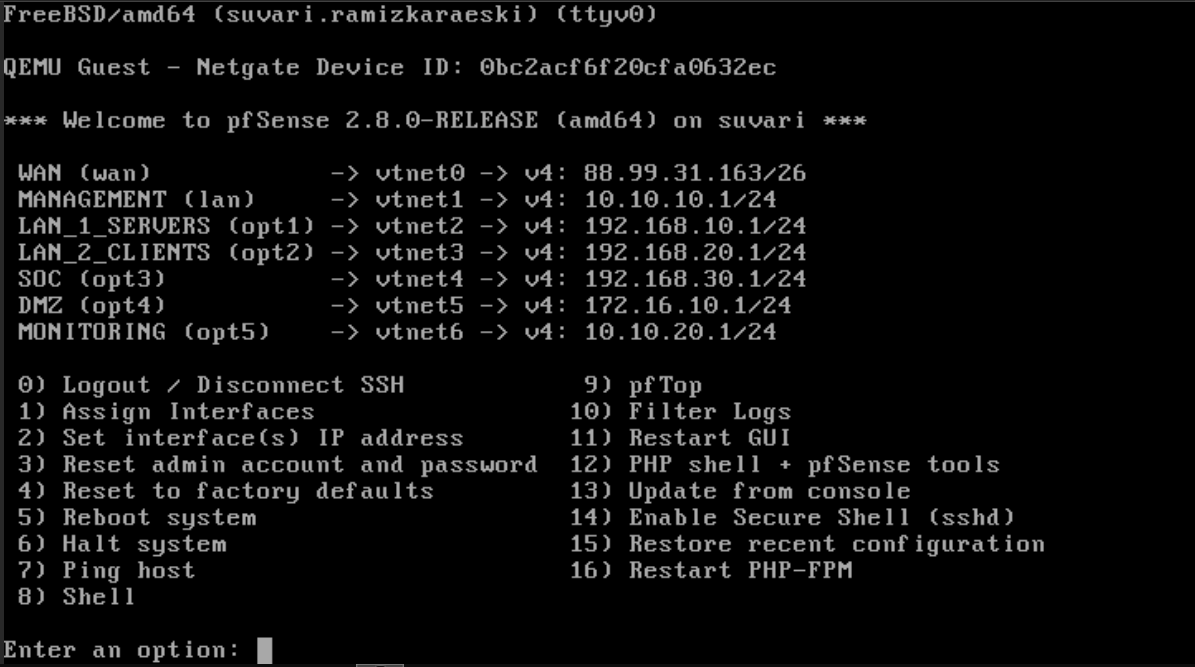
Pay close attention when arranging interfaces to ensure you configure everything else properly.
Installations
I don’t want to make this document too cluttered, so I’ll guide you through the installation process via links that I used when I encountered issues.
Active Directory Domain Controller Installation:
https://ittechnetworkk.github.io/posts/addcinstallation/ad-dc-installation/
https://www.ibm.com/docs/en/storage-scale-bda?topic=support-install-configure-active-directory
You may also consider using Samba DC, which is a great alternative :)
Windows Client Domain Join:
https://woshub.com/add-computer-to-active-directory-domain/
https://www.tenforums.com/tutorials/90045-join-windows-10-pc-domain.html
Linux Domain Join
https://www.redhat.com/en/blog/linux-active-directory
Wazuh Installation
https://documentation.wazuh.com/current/quickstart.html
Wazuh Agent Installation
Pfsense
Here you can find both Wazuh Agent installation and how to send logs (including Suricata logs) to the Wazuh server.
https://benheater.com/integrating-pfsense-with-wazuh/
https://kifarunix.com/install-wazuh-agent-on-pfsense/
Alternatively, you can send pfSense logs via Syslog by following these guides:
https://devopstales.github.io/linux/wazuh-pfsense-syslog/
https://app.letsdefend.io/training/lesson_detail/collecting-logs-with-syslog
Windows
https://documentation.wazuh.com/current/installation-guide/wazuh-agent/index.html
If you want to integrate Sysmon, follow these guides:
https://app.letsdefend.io/training/lesson_detail/introduction-and-set-up-of-sysmon
https://app.letsdefend.io/training/lesson_detail/windows-wazuh-agent-installation-and-log-collectio
Linux
https://documentation.wazuh.com/current/installation-guide/wazuh-agent/index.html
TheHive + Cortex Installation
You can find many TheHive+Cortex installation guides, Docker Compose files, and similar resources, but here is my repository that I created to deploy TheHive and Cortex. There you can also find instructions on how to install and configure Cortex Analyzers and Responders.
https://github.com/ssnrshnn/TheHive-Cortex
Velociraptor Installation and Agent Deployment
https://docs.velociraptor.app/docs/deployment/quickstart/
Checkmk Installation
https://docs.checkmk.com/latest/en/intro_setup.html
T-Pot Honeypot Installation
https://github.com/telekom-security/tpotce
Pfsense Suricata Configuration
https://tech.lobobrothers.com/en/configuring-suricata-in-pfsense/
https://hackzone.in/blog/how-to-install-suricata-on-pfsense-a-step-by-step-guide/
Pfsense OpenVPN Installation
https://www.heimnetz.de/anleitungen/firewall/pfsense/pfsense-openvpn-server-einrichten/
https://www.comparitech.com/blog/vpn-privacy/openvpn-server-pfsense/
Pfsense Dashboard
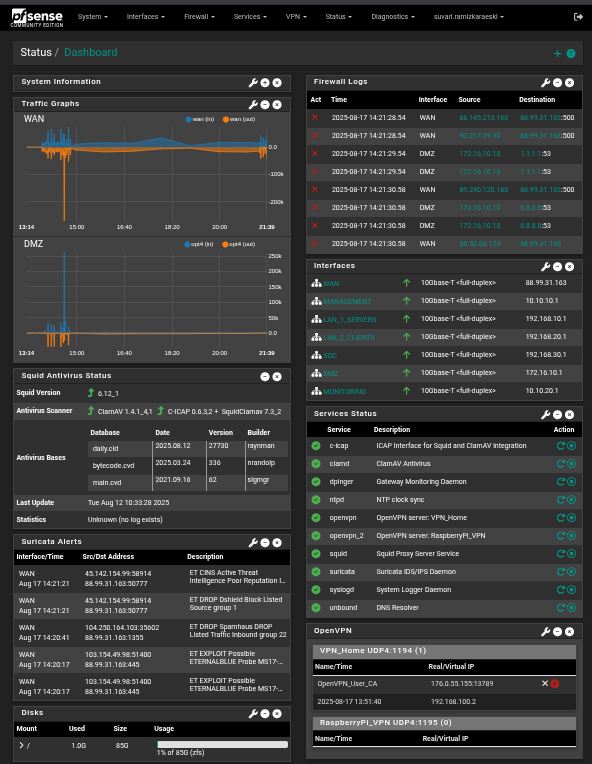
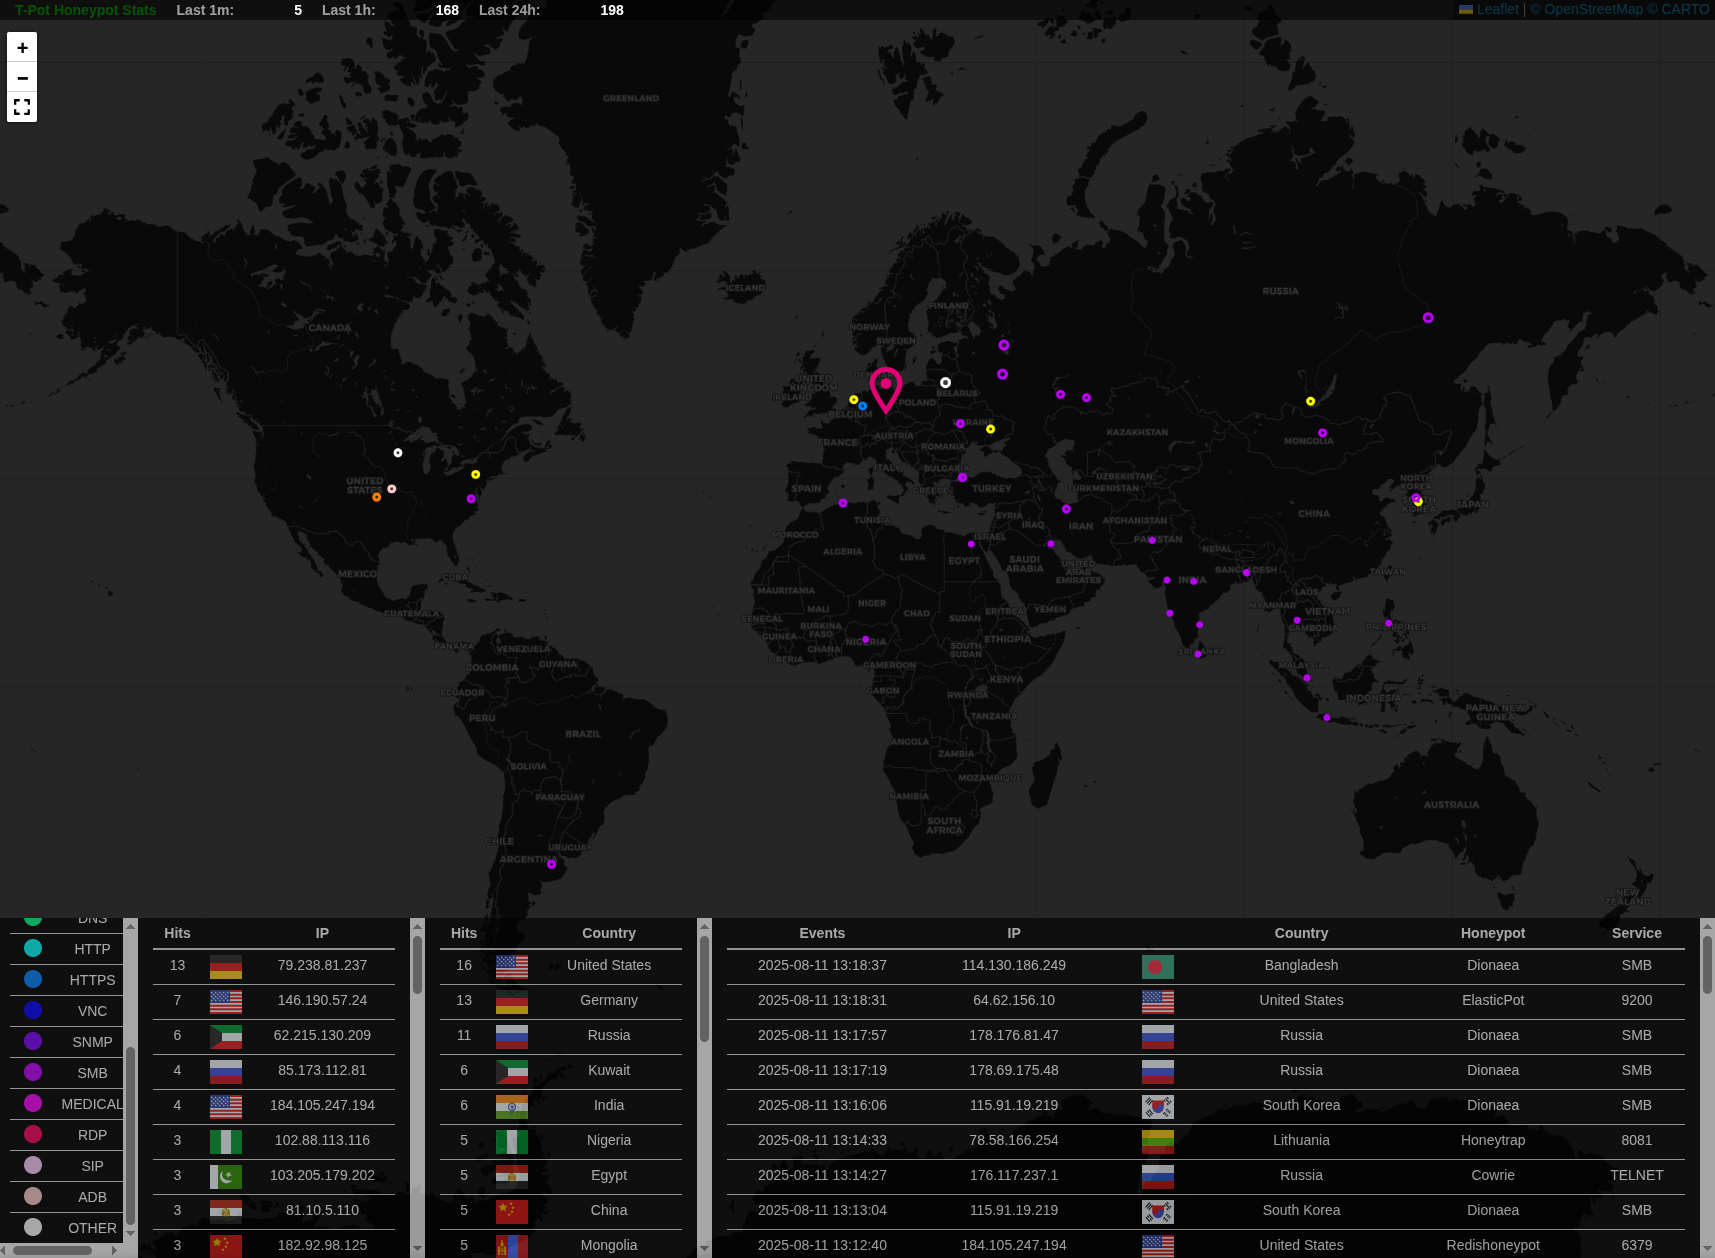
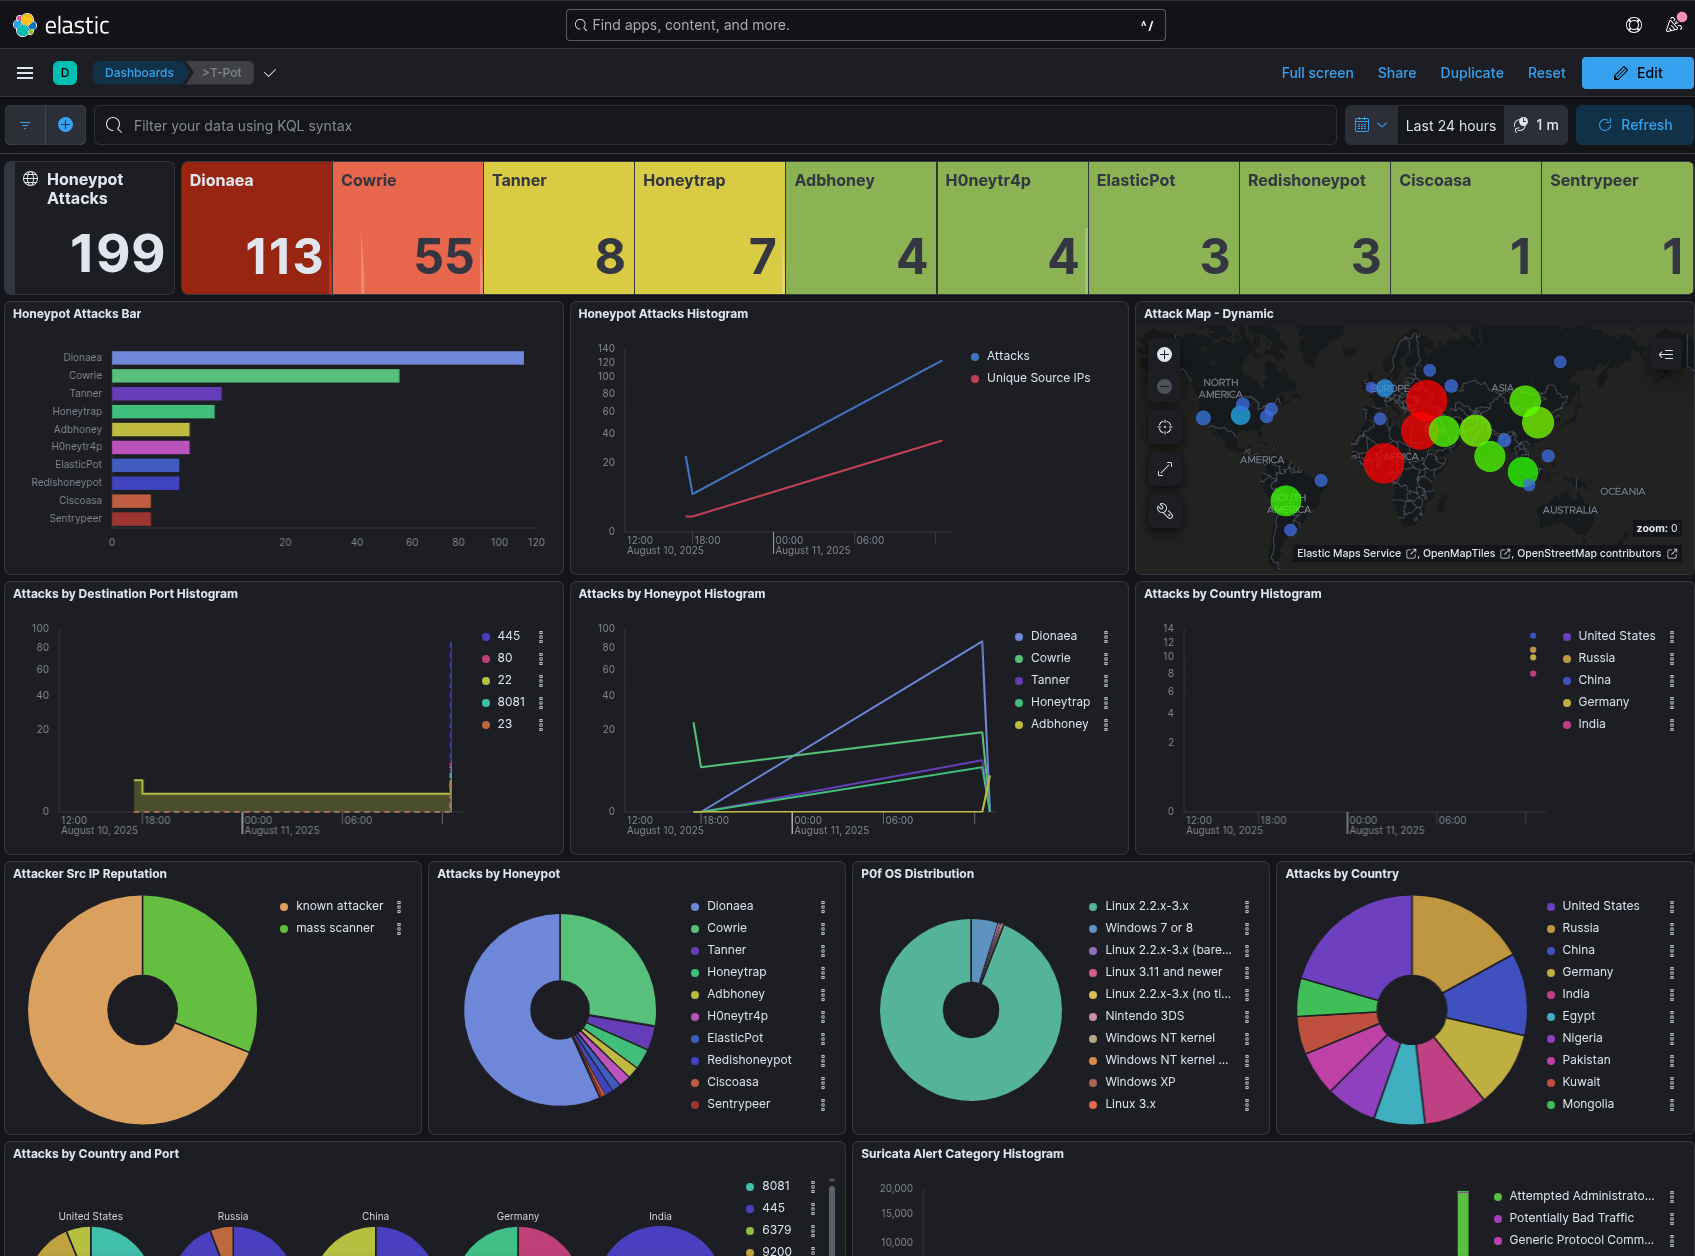
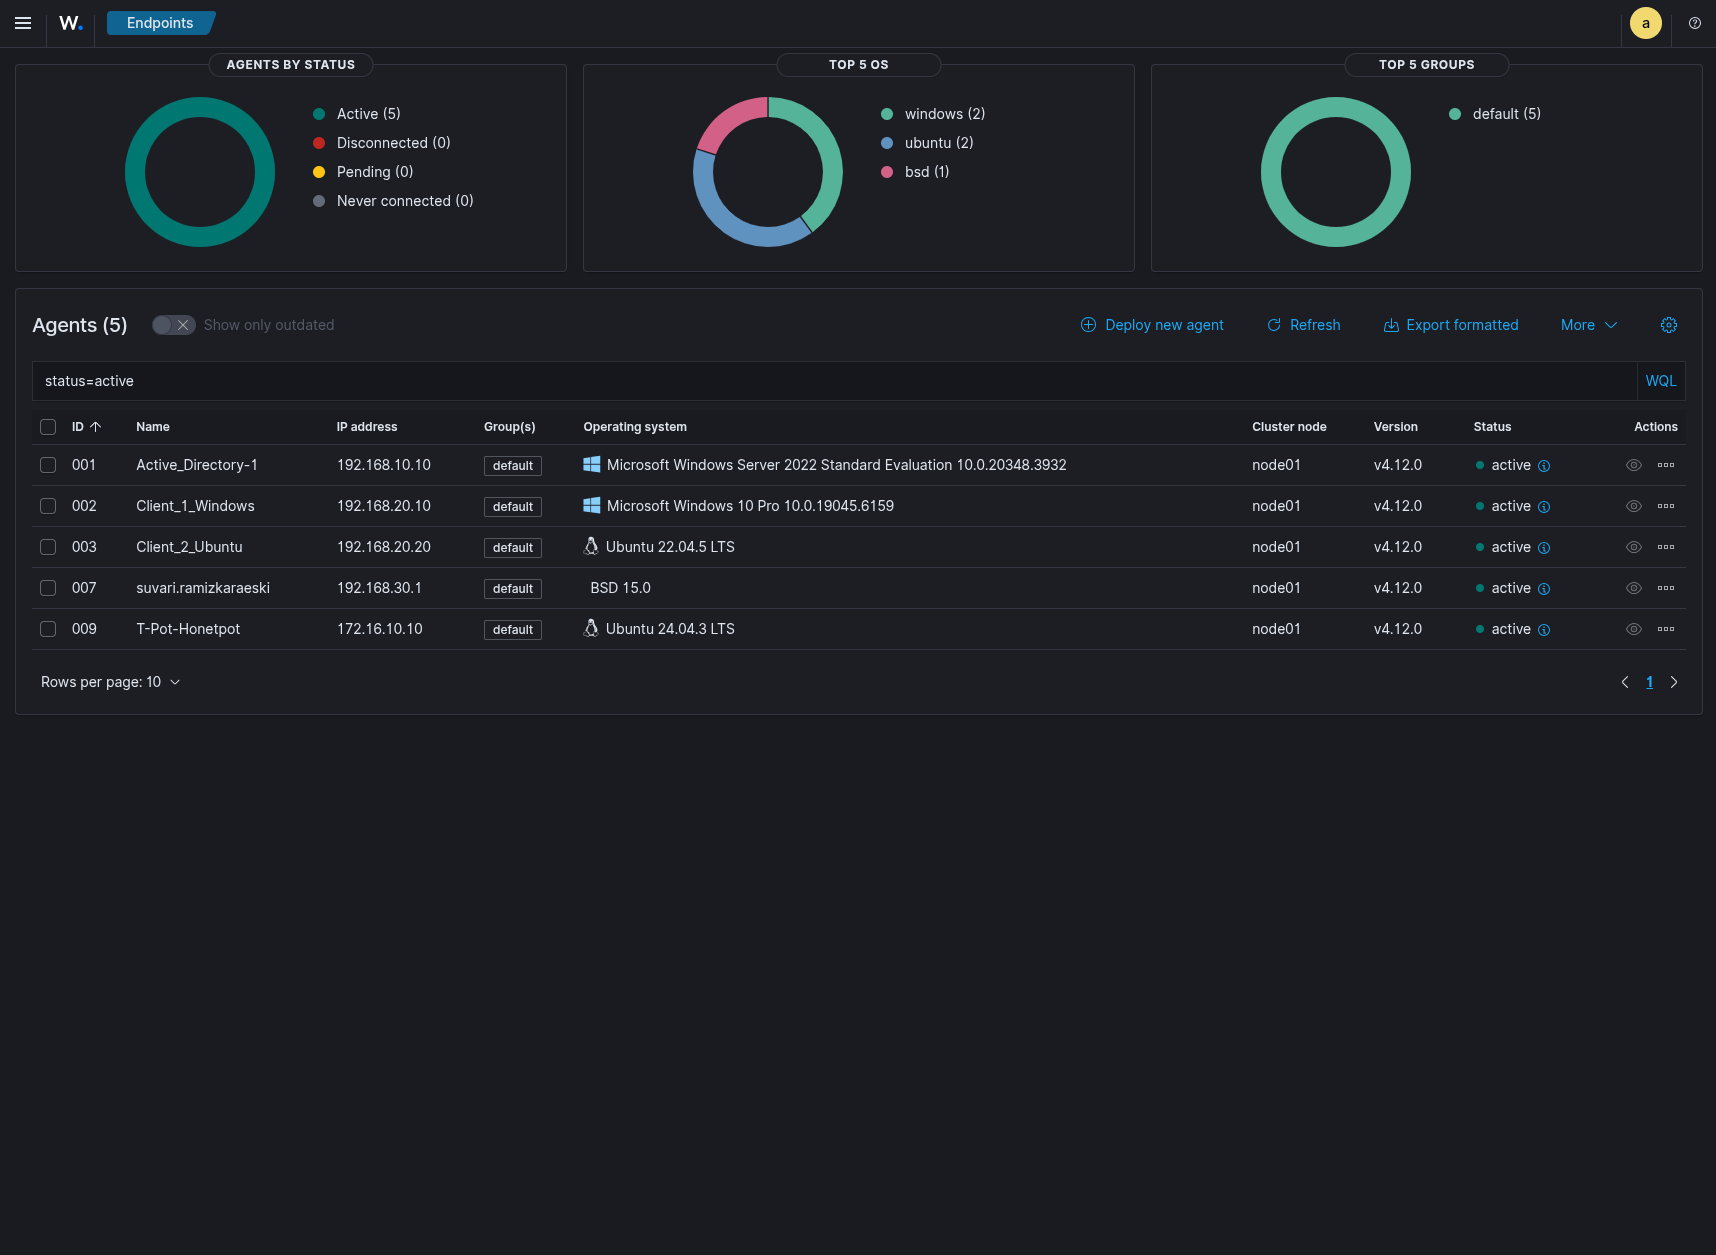
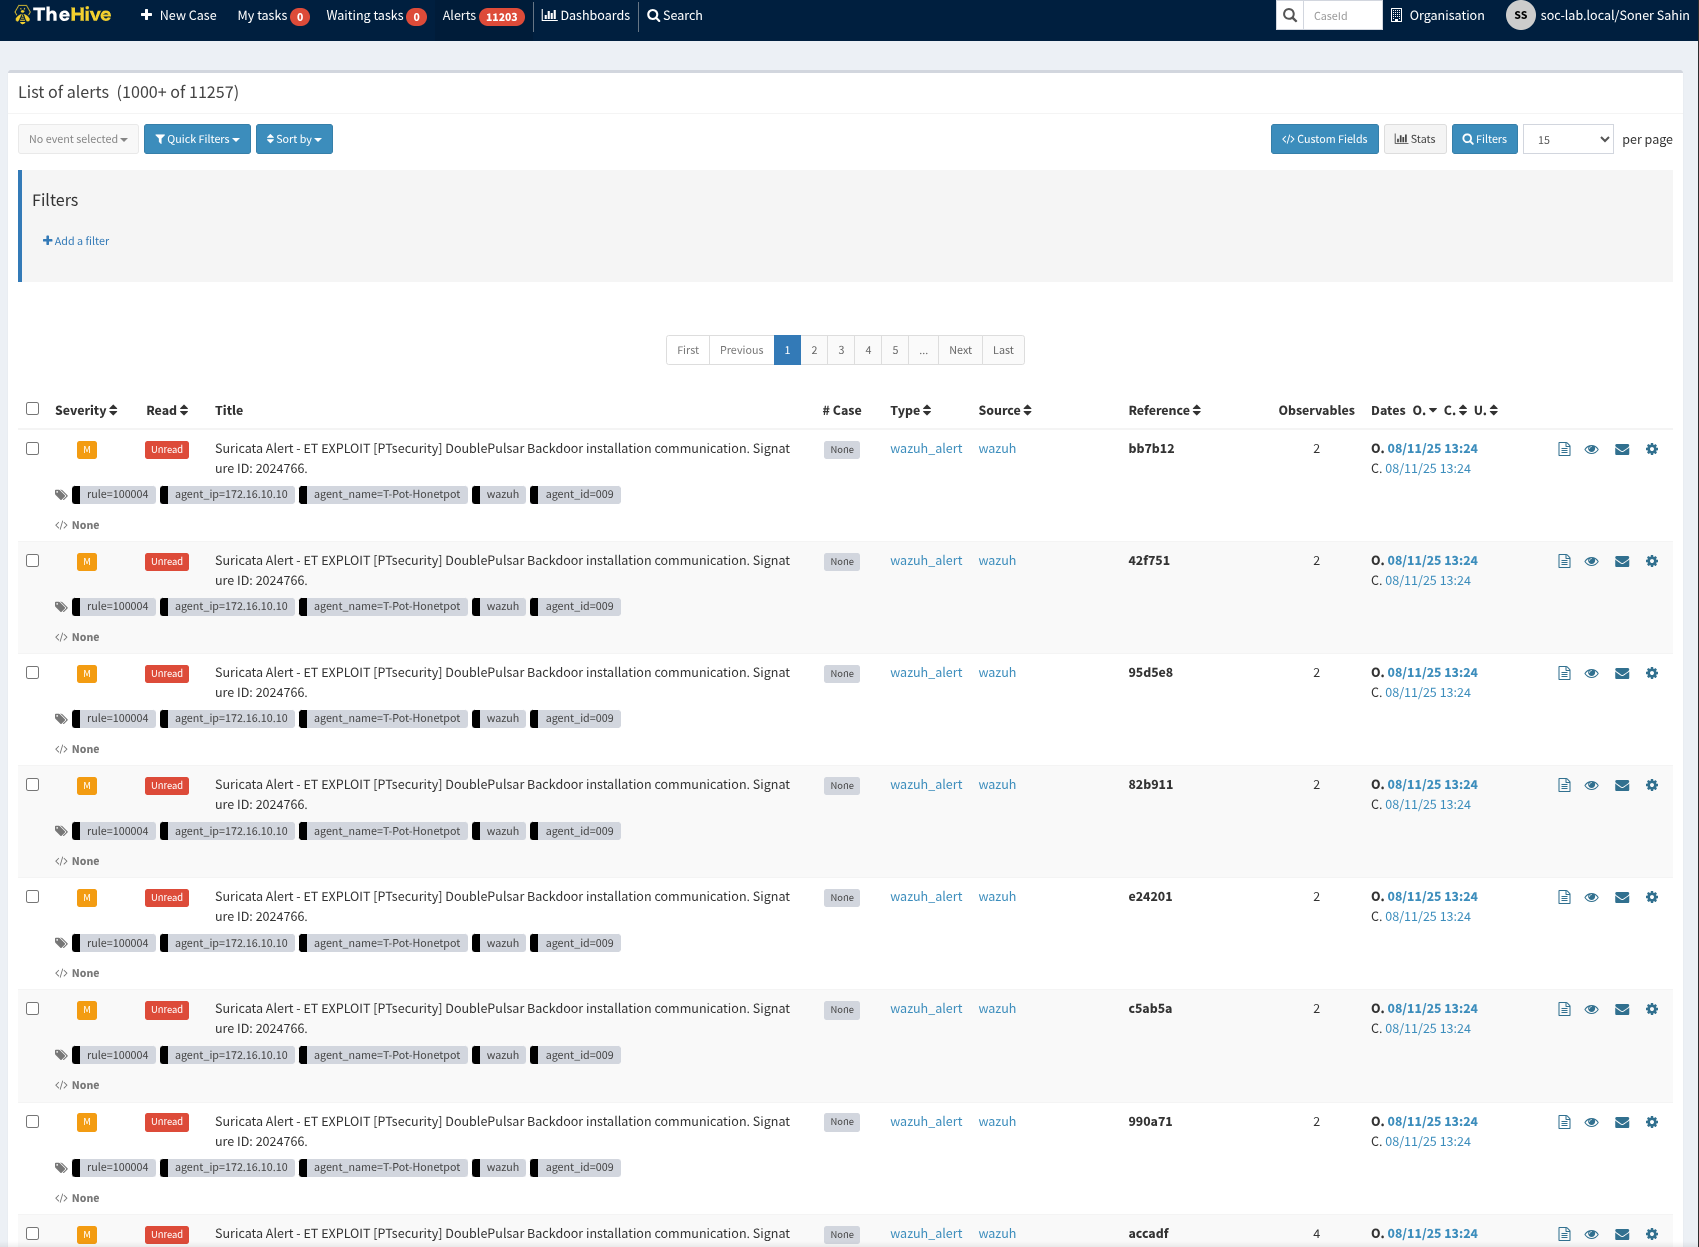
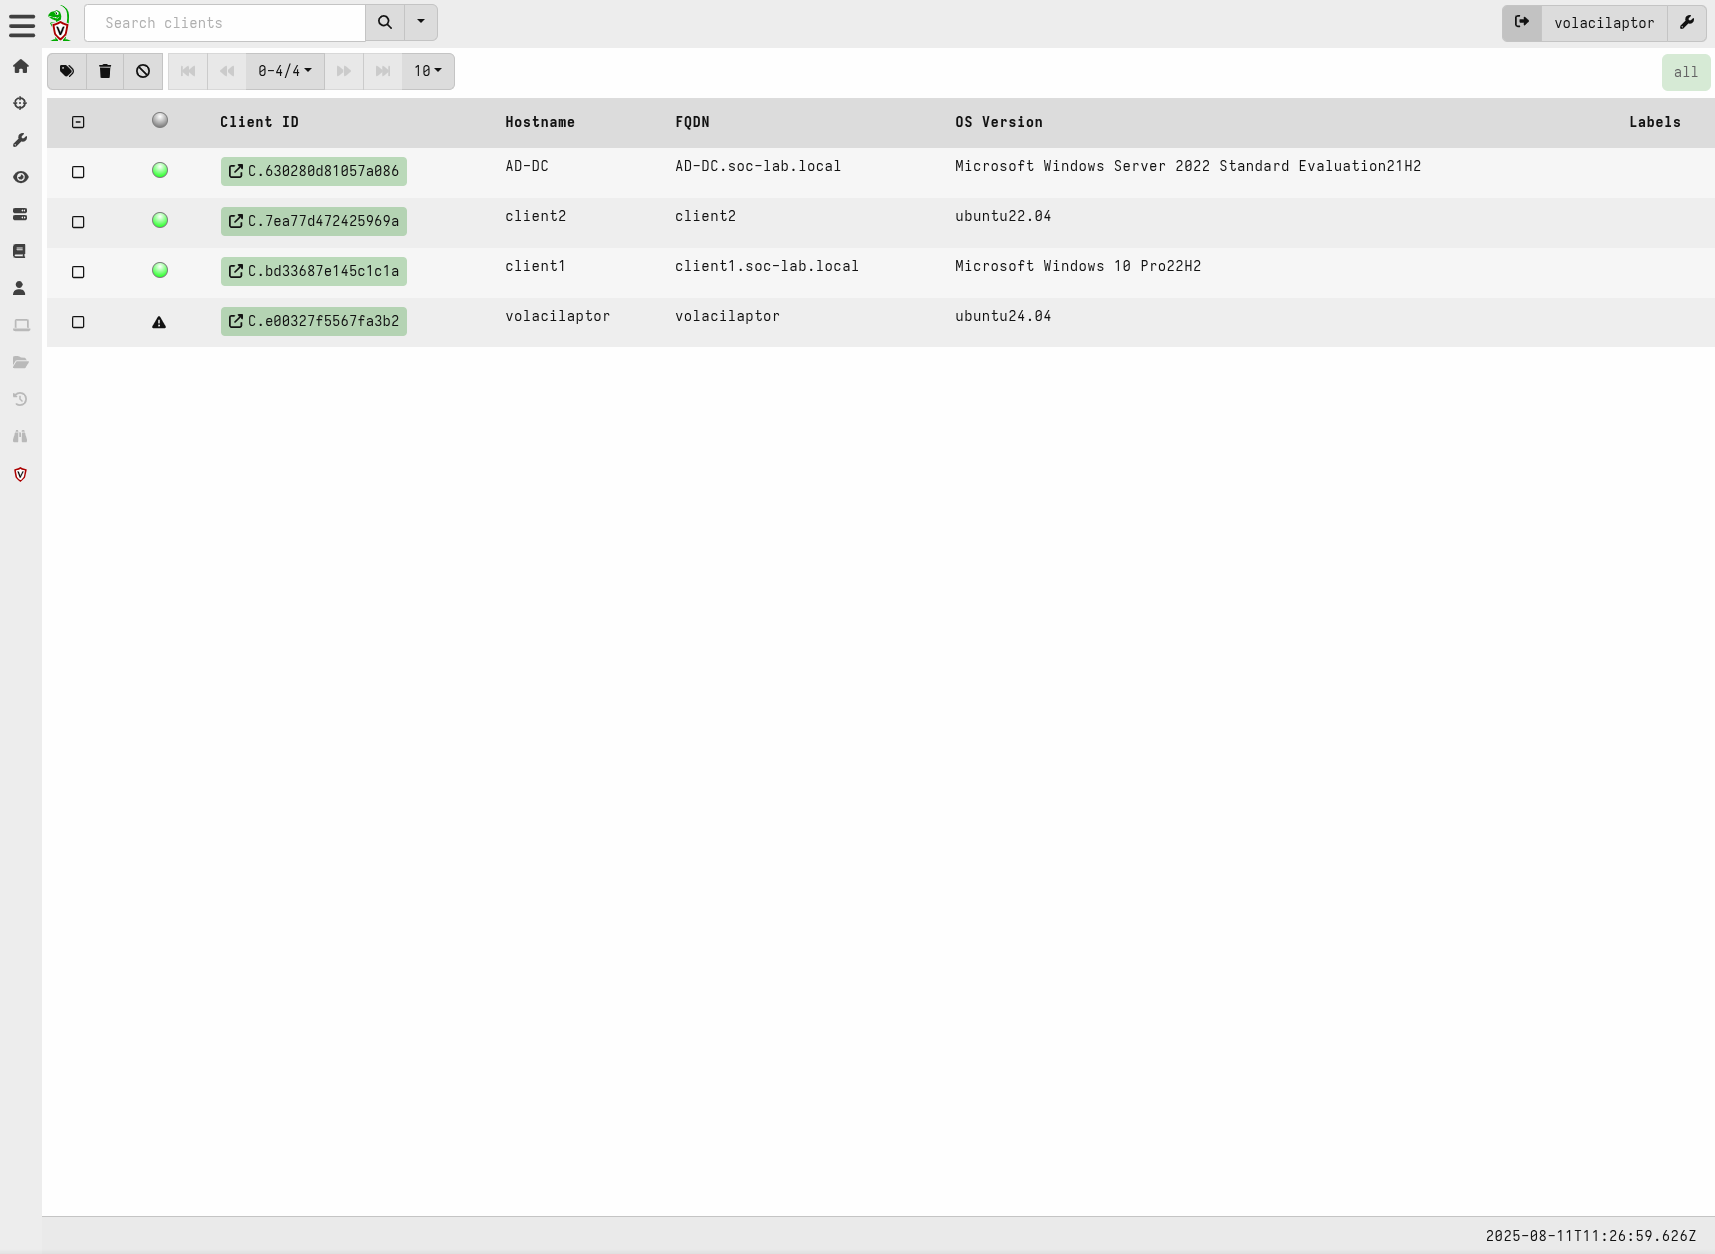
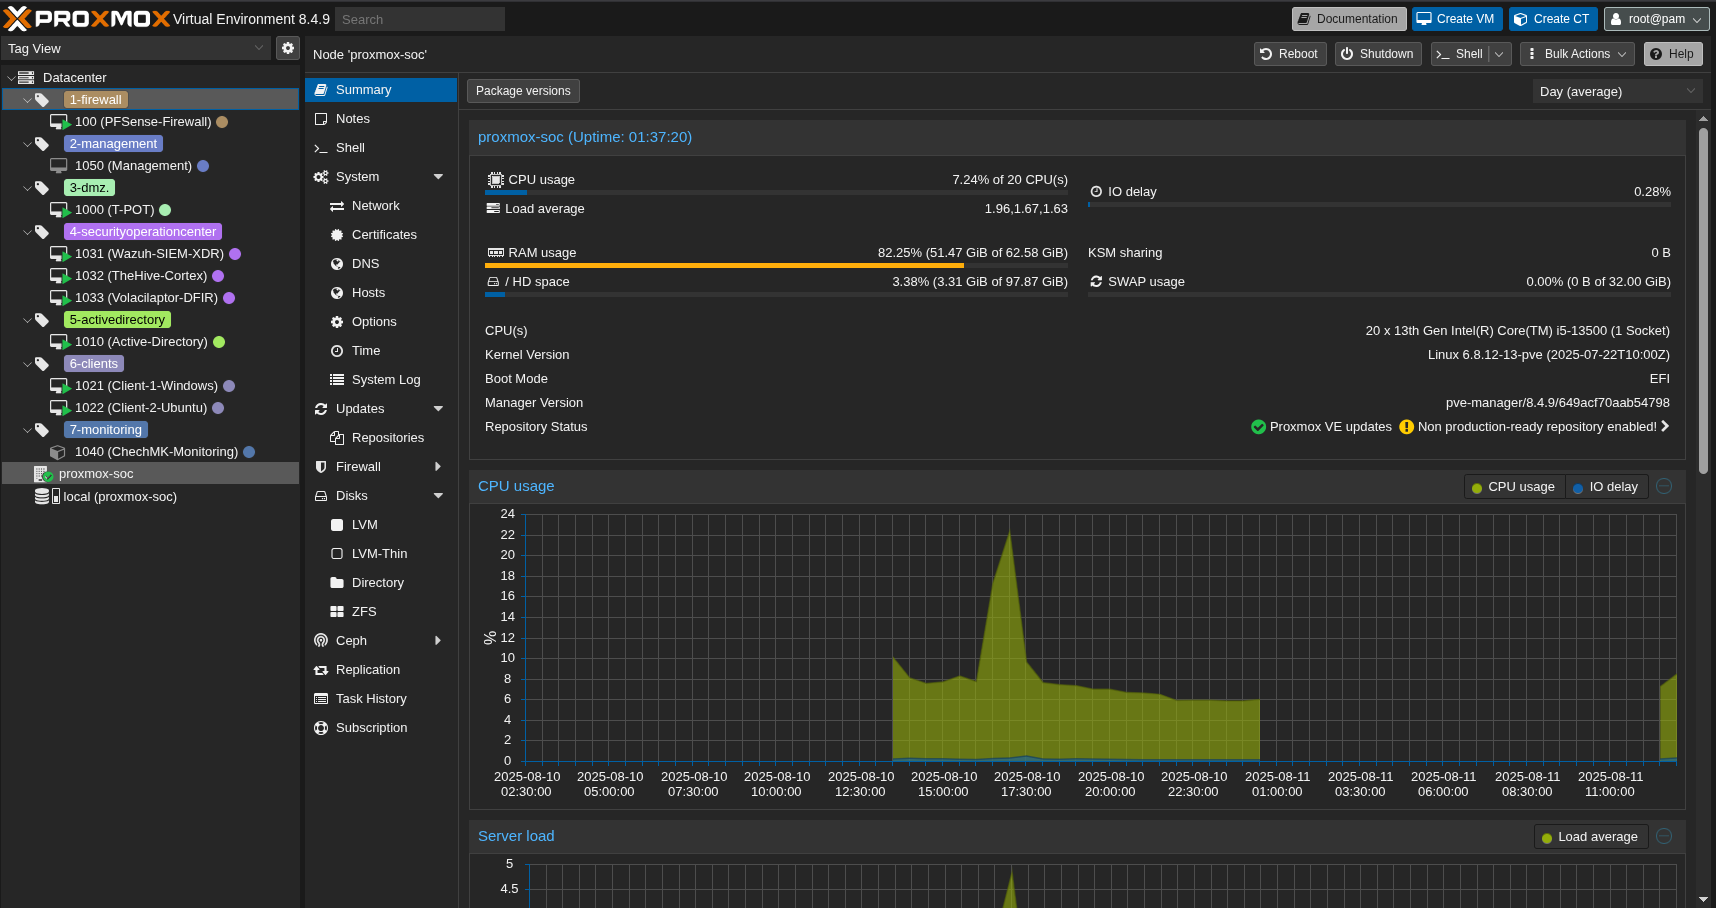
Here are some images of my Security Operation Center.
Attack Map
Kibana
Wazuh
TheHive+Cortex
Volacilaptor
Pfsense Firewall

Proxmox
Resources
A huge thanks to Huseyin Eksi
https://github.com/tallcyberguy/opensoc
https://www.youtube.com/watch?v=0ekj_5hMiBw
https://documentation.wazuh.com/current/index.html
https://community.hetzner.com/tutorials
https://docs.netgate.com/pfsense/en/latest/
https://github.com/telekom-security/tpotce
https://docs.velociraptor.app/docs/
https://docs.checkmk.com/latest/en/
https://bobcares.com/blog/pfsense-dmz-setup/
https://www.heimnetz.de/anleitungen/firewall/pfsense/pfsense-openvpn-server-einrichten/
https://www.comparitech.com/blog/vpn-privacy/openvpn-server-pfsense/
What’s next?
Sending critical alerts via mail.
Raspberry Pi Zero alert notification.
Telegram Bot.
Thank you for taking the time to read this article. I hope you find it helpful.
Keep up the great work!