[EN] Proxmox NAT Configuration
Hi everyone!
In this article, I will walk you through the complete process of setting up a Network Address Translation (NAT) network on Proxmox. This setup will allow your virtual machines to access the internet through your Proxmox host while maintaining network isolation.
Create a Linux Bridge
The first step is to create a Linux Bridge interface. This will serve as the foundation for our NAT network.
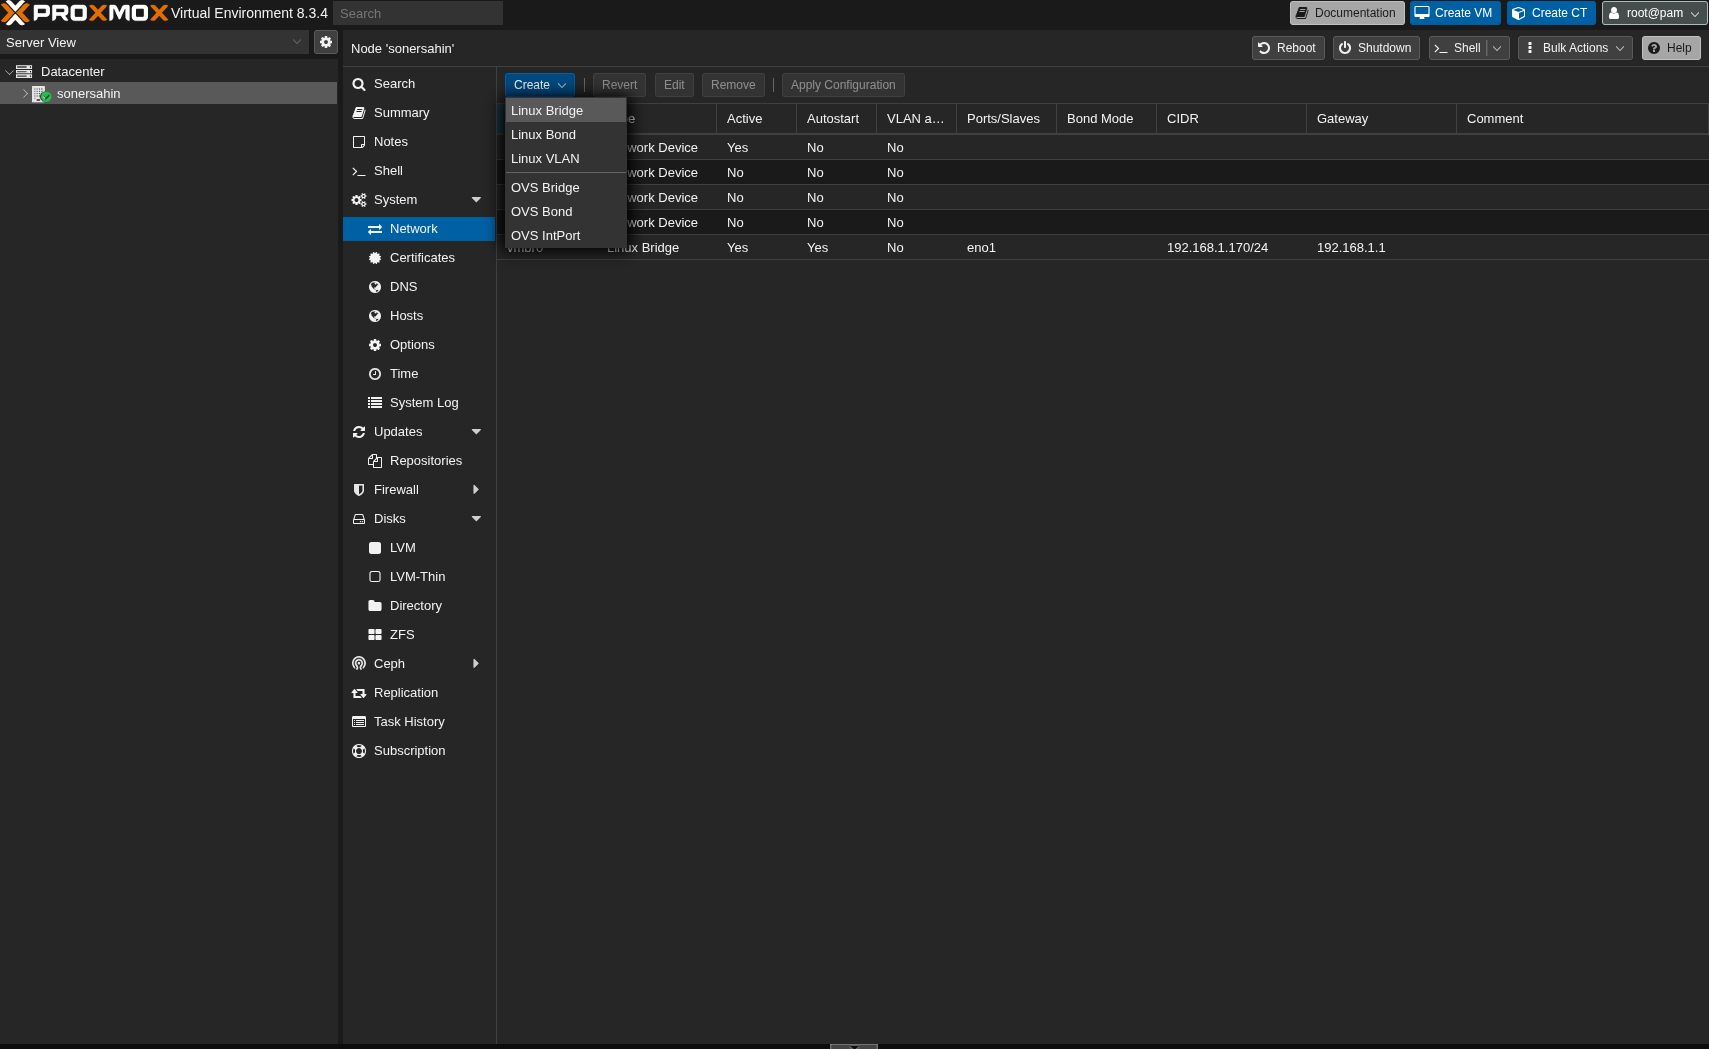
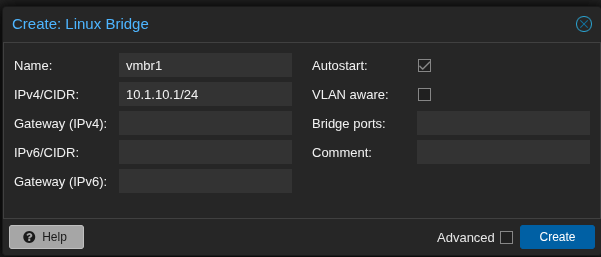
Configure IPv4/CIDR Address
Next, we need to assign an IPv4/CIDR address to the new Linux Bridge interface. Choose a private network range that doesn’t conflict with your existing network.
Edit Network Configuration
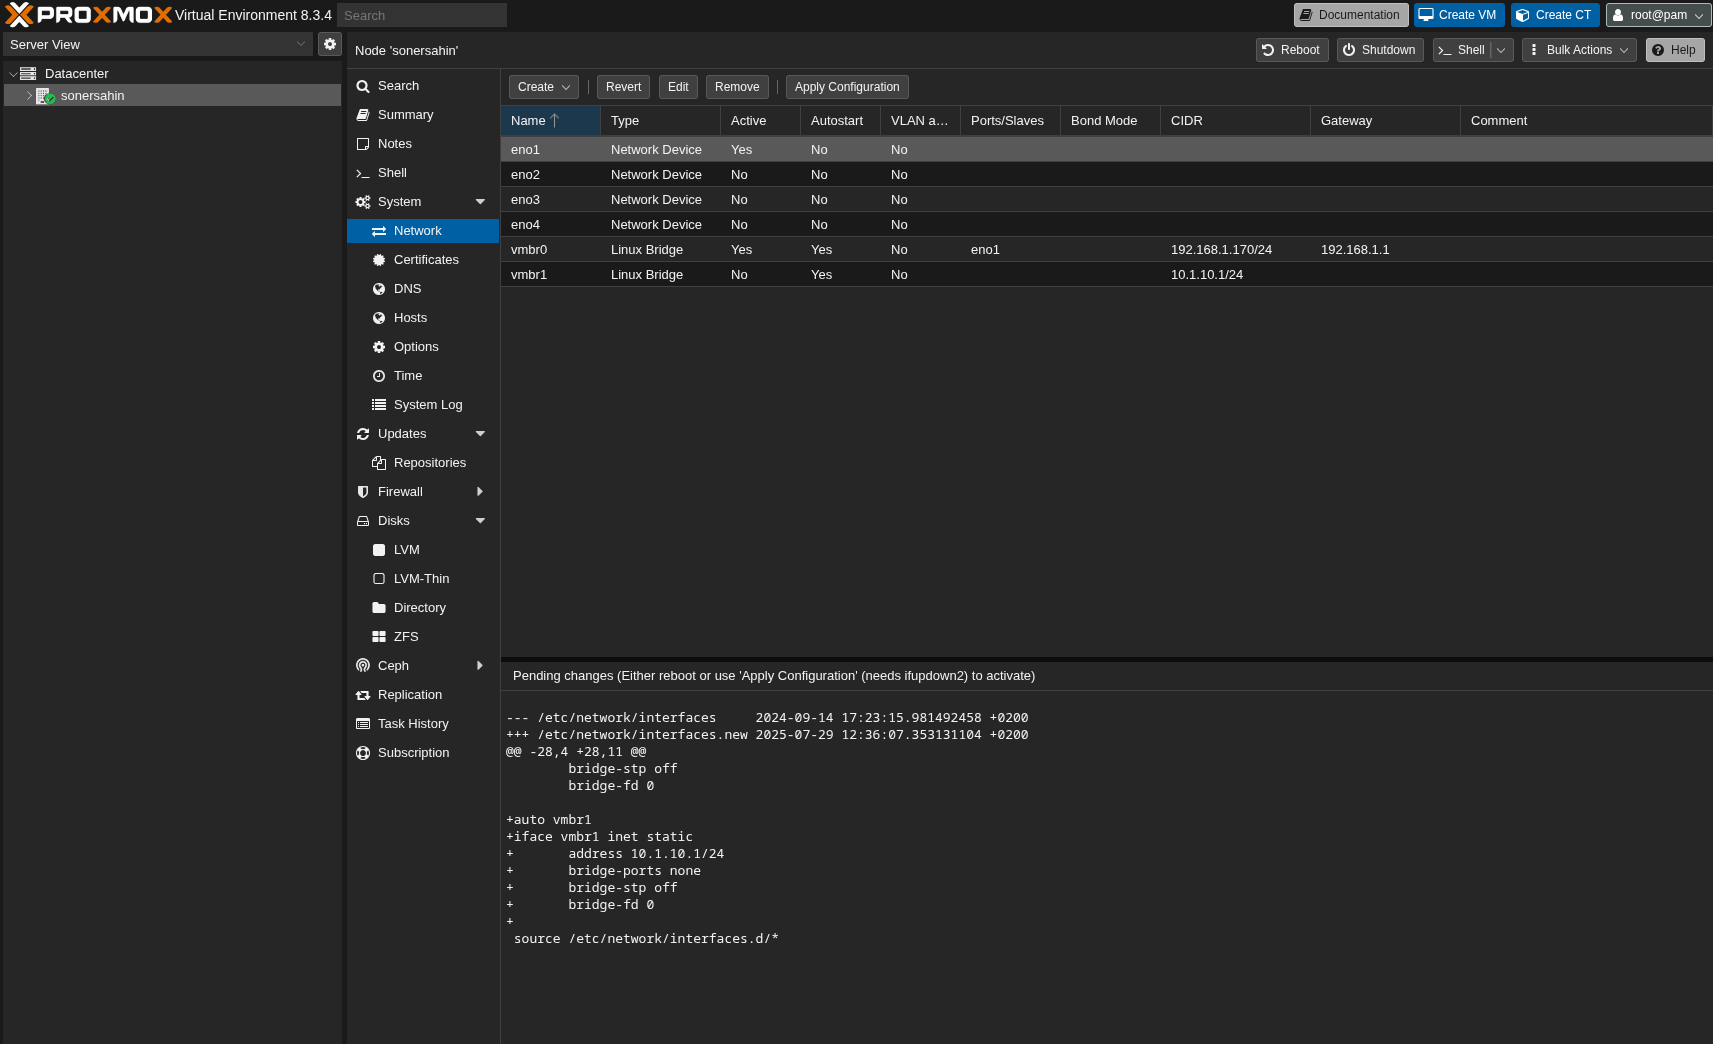
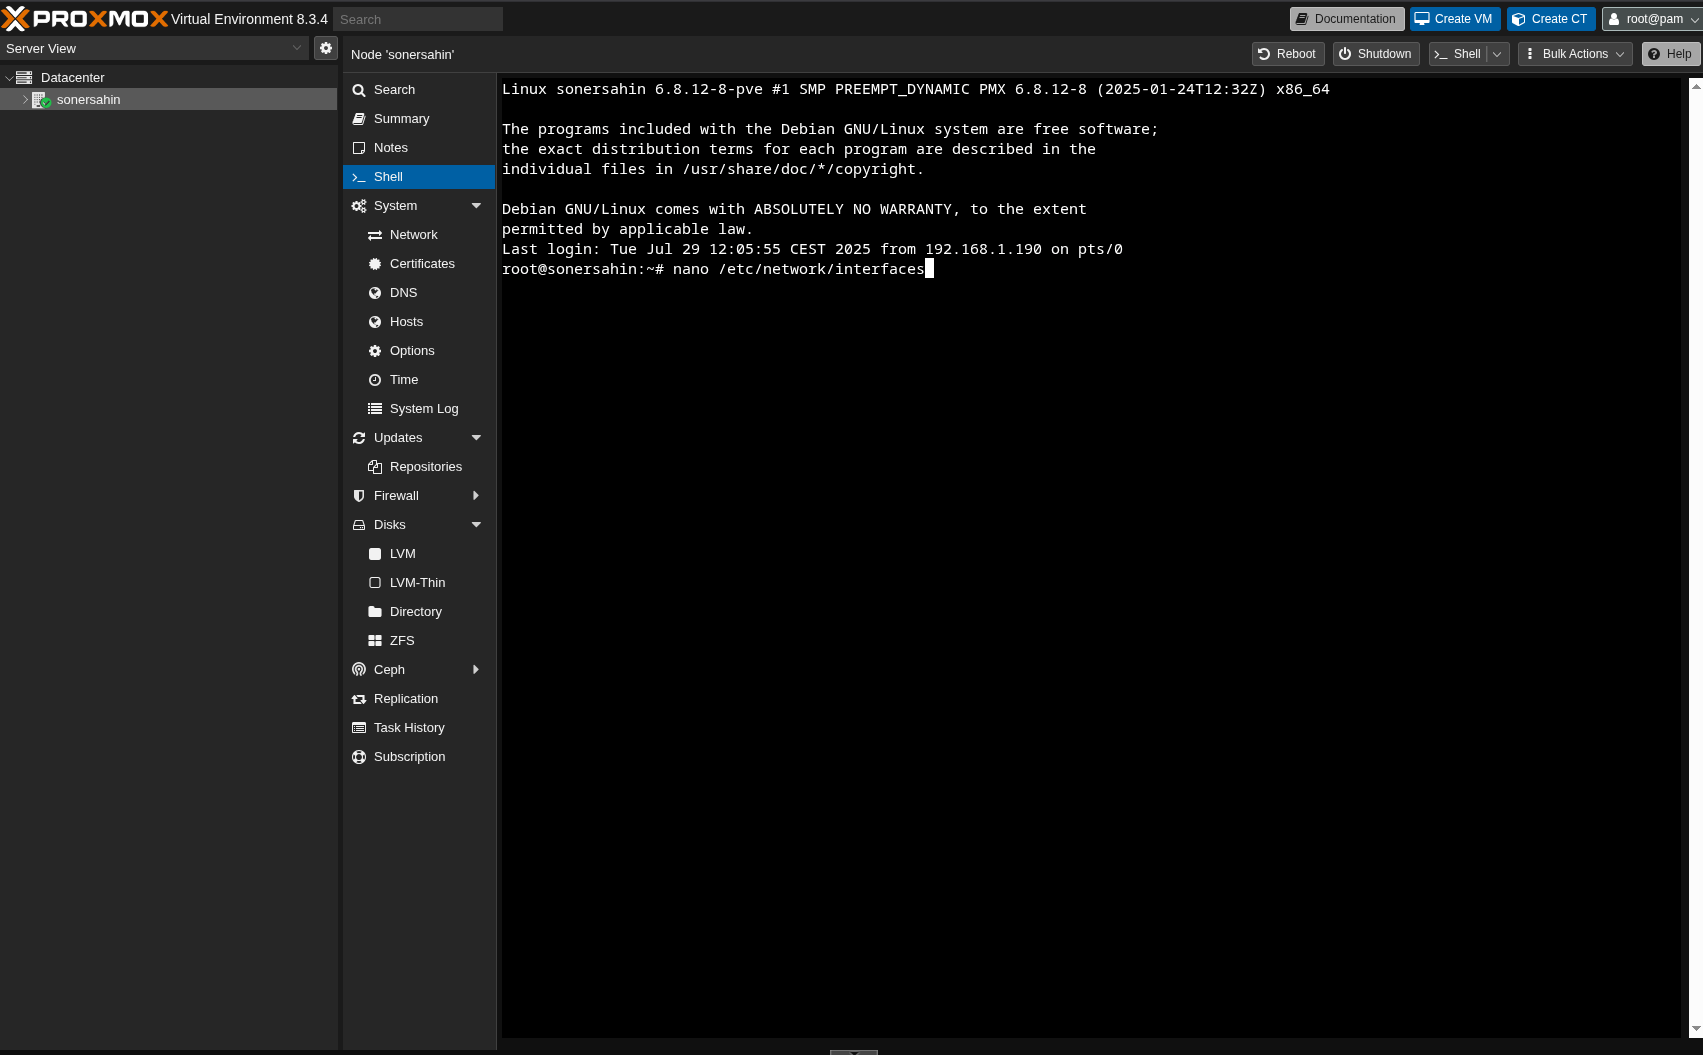
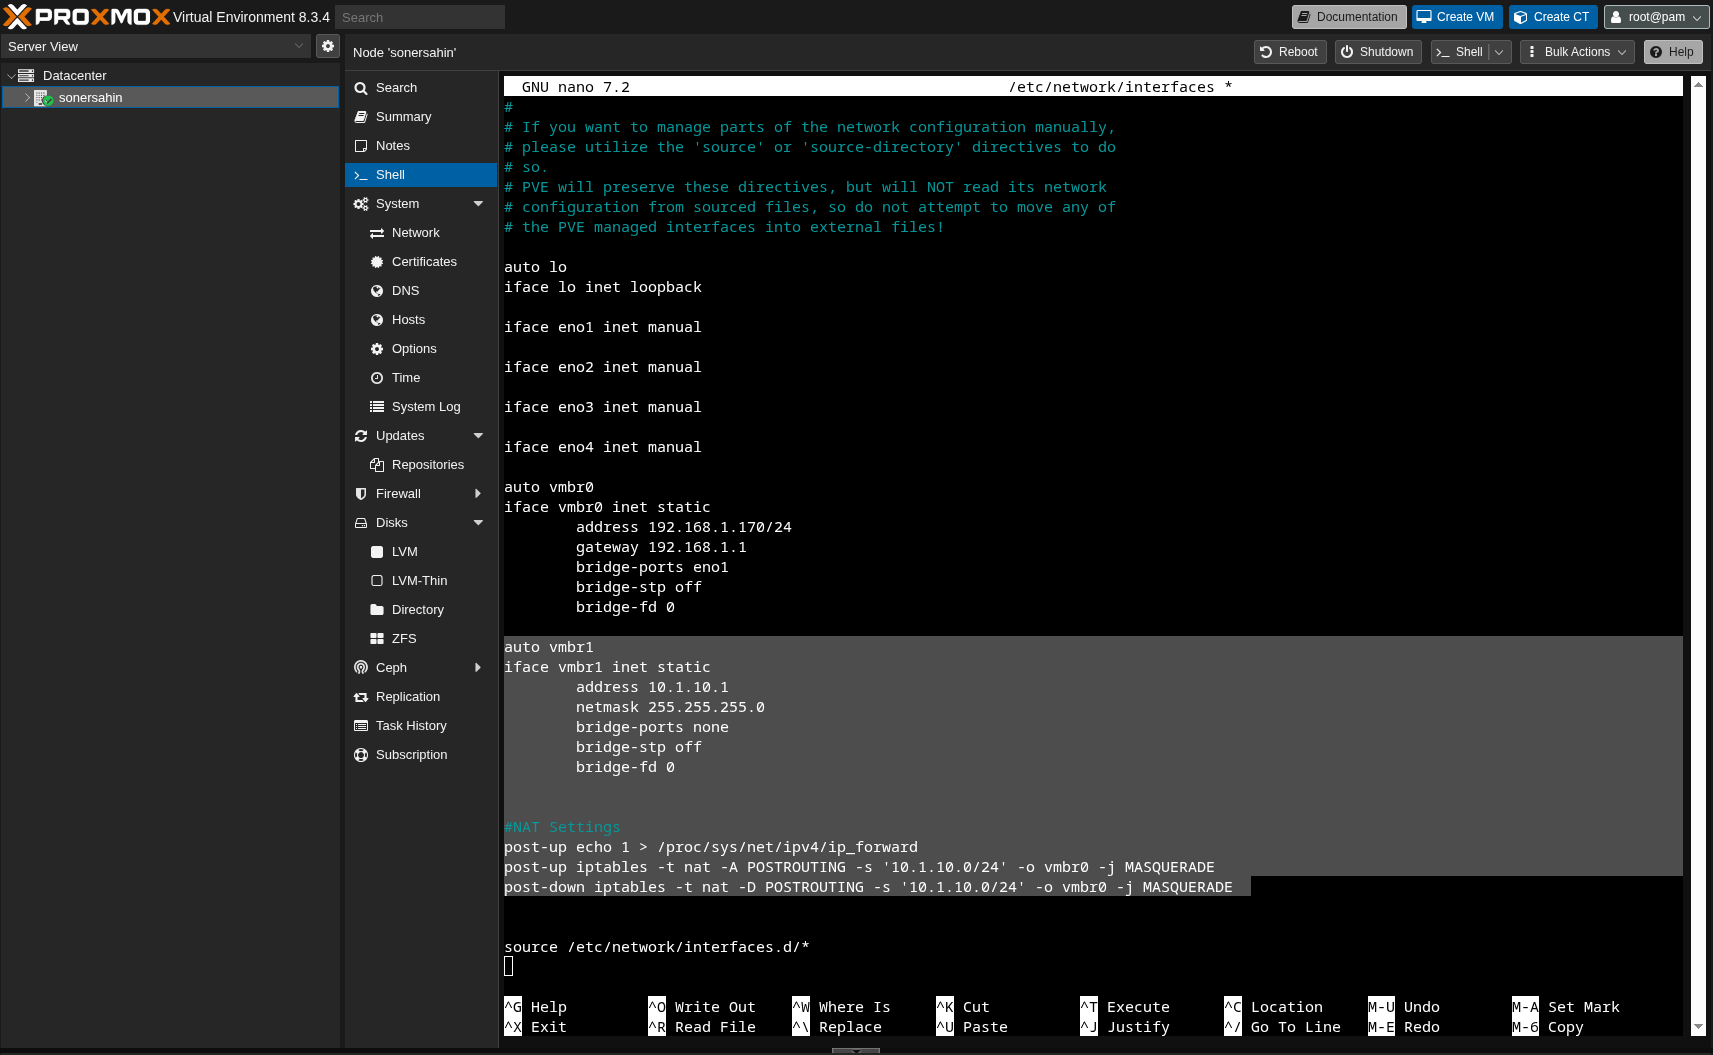
Now we need to add specific configuration lines to the /etc/network/interfaces file to enable NAT functionality. Access the Proxmox shell and open the file with a text editor:
1root@sonersahin:~# nano /etc/network/interfaces
Add NAT Configuration
Add the following configuration to your interfaces file. Make sure to adjust the network addresses according to your specific network setup:
 1auto vmbr1
 2iface vmbr1 inet static
 3        address 10.1.10.1
 4        netmask 255.255.255.0
 5        bridge-ports none
 6        bridge-stp off
 7        bridge-fd 0
 8
 9# NAT Settings
10post-up echo 1 > /proc/sys/net/ipv4/ip_forward
11post-up iptables -t nat -A POSTROUTING -s '10.1.10.0/24' -o vmbr0 -j MASQUERADE
12post-down iptables -t nat -D POSTROUTING -s '10.1.10.0/24' -o vmbr0 -j MASQUERADE
- Bridge Interface:
vmbr1is our new NAT bridge - Network Address:
10.1.10.1/24(adjust to your needs) - IP Forwarding: Enables packet forwarding between interfaces
- NAT Rules: Masquerades traffic from the NAT network through the main interface
Your configuration should look like this after saving:
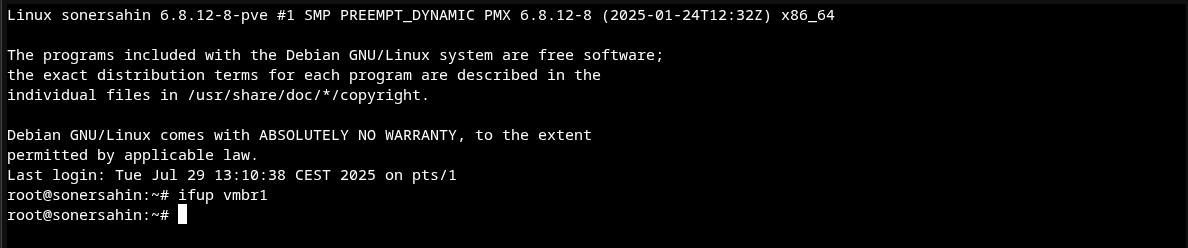
Activate the Interface
After saving the configuration, activate the new interface:
1root@sonersahin:~# ifup vmbr1
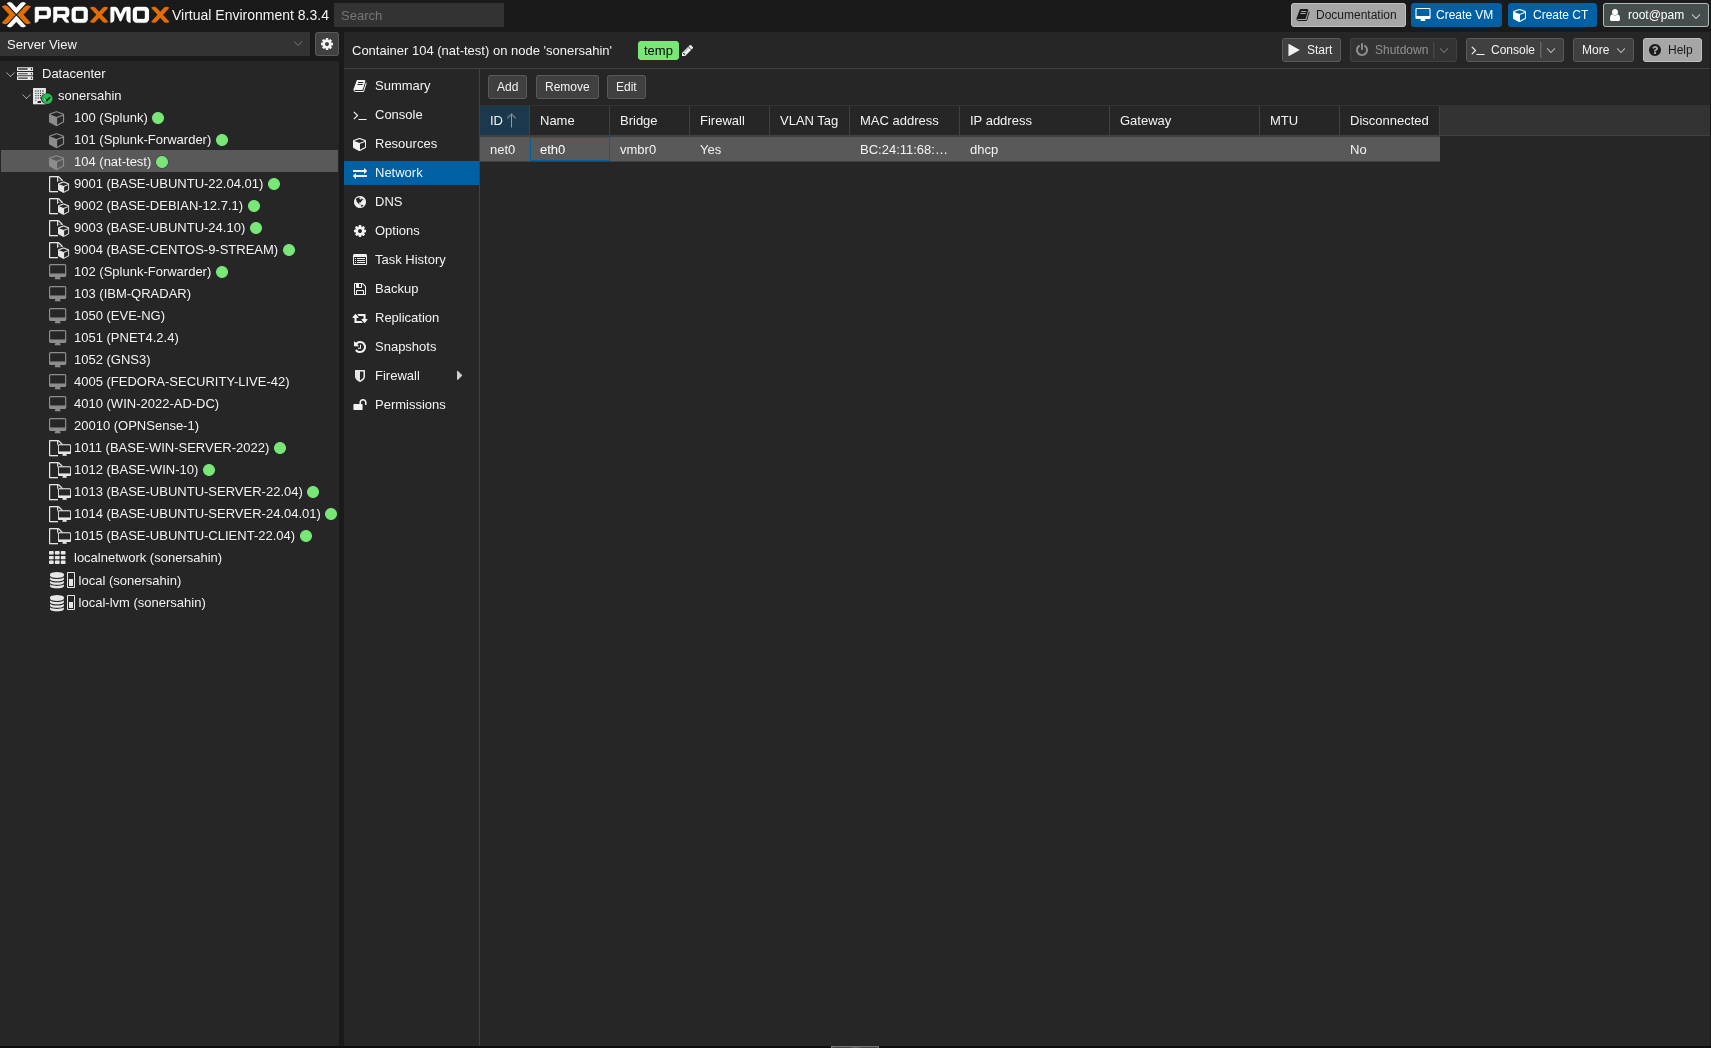
Assign NAT Interface to VM
Now you can assign the NAT interface to your virtual machines. In the VM configuration, select the new bridge interface:
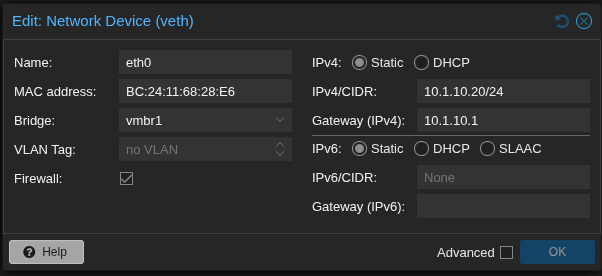
Testing the Configuration
Finally, test your NAT configuration to ensure everything is working correctly:

Understanding the NAT Configuration
post-up echo 1 > /proc/sys/net/ipv4/ip_forward- Enables IP forwarding on the host
post-up iptables -t nat -A POSTROUTING -s '10.1.10.0/24' -o vmbr0 -j MASQUERADE- Adds NAT rule to masquerade outbound traffic from the NAT network
post-down iptables -t nat -D POSTROUTING -s '10.1.10.0/24' -o vmbr0 -j MASQUERADE- Removes the NAT rule when the interface is brought down
Setting up a NAT network on Proxmox is straightforward when you understand the key components. This configuration allows your VMs to access the internet while maintaining network isolation, making it perfect for development, testing, and secure environments.
Remember to adjust the network addresses according to your specific infrastructure needs and always test the configuration before deploying to production.
Thank you for taking the time to read this article. I hope you find it helpful in setting up your Proxmox NAT network!
Keep up the great work!