[EN] NetworkManager Installation
Hi there, in this article, I will show you how to switch netplan to NetworkManager to manage network interfaces on Ubuntu.
As you know, Ubuntu uses netplan as the default tool for network management. However NetworkManager is often a better choice due to its advanced features and ease of use.
In this guide, I’ll walk you through the steps to install and configure NetworkManager on an Ubuntu Server.
Step 1: Install NetworkManager
First, we need to install the network-manager package on our Ubuntu machine.
Open a terminal and run the following commands:
ubuntu@ubuntu:~$ sudo apt update && sudo apt upgrade -y
ubuntu@ubuntu:~$ sudo apt install network-manager -y
You should see an output indicating that NetworkManager is installed and running:
ubuntu@ubuntu:~$ systemctl status NetworkManager

● NetworkManager.service - Network Manager
     Loaded: loaded (/lib/systemd/system/NetworkManager.service; enabled; vendor preset: enabled)
     Active: active (running) since Fri 2025-01-24 19:43:42 UTC; 8s ago
       Docs: man:NetworkManager(8)
   Main PID: 2139 (NetworkManager)
      Tasks: 4 (limit: 2182)
     Memory: 3.1M
        CPU: 20ms
     CGroup: /system.slice/NetworkManager.service
             └─2139 /usr/sbin/NetworkManager --no-daemon
Step 2: Delegate Network Management to NetworkManager
Next, we need to configure Ubuntu to delegate network management to NetworkManager. To do this, edit the file /usr/lib/NetworkManager/conf.d/10-globally-managed-devices.conf
Original File:
[keyfile]
unmanaged-devices=*,except:type:wifi,except:type:gsm,except:type:cdma
Updated File:
[keyfile]
unmanaged-devices=*,except:type:wifi,except:type:gsm,except:type:cdma,except:type:ethernet
Restart the NetworkManager service:
sudo systemctl restart NetworkManager
After configuring the file, you need to create a profile for your ethernet adapter using the nmtui tool, which provides a simple graphical interface.
Find Your Network Adapter Name
The output will list all available network interfaces. For example:
ubuntu@ubuntu:~$ ip a
1: lo: <LOOPBACK,UP,LOWER_UP> mtu 65536 qdisc noqueue state UNKNOWN group default qlen 1000
    link/loopback 00:00:00:00:00:00 brd 00:00:00:00:00:00
    inet 127.0.0.1/8 scope host lo
       valid_lft forever preferred_lft forever
    inet6 ::1/128 scope host
       valid_lft forever preferred_lft forever
2: ens33: <BROADCAST,MULTICAST,UP,LOWER_UP> mtu 1500 qdisc fq_codel state UP group default qlen 1000
    link/ether 00:0c:29:c6:78:5c brd ff:ff:ff:ff:ff:ff
    altname enp2s1
    inet 172.16.238.139/24 metric 100 brd 172.16.238.255 scope global dynamic ens33
       valid_lft 1047sec preferred_lft 1047sec
    inet6 fe80::20c:29ff:fec6:785c/64 scope link
       valid_lft forever preferred_lft forever
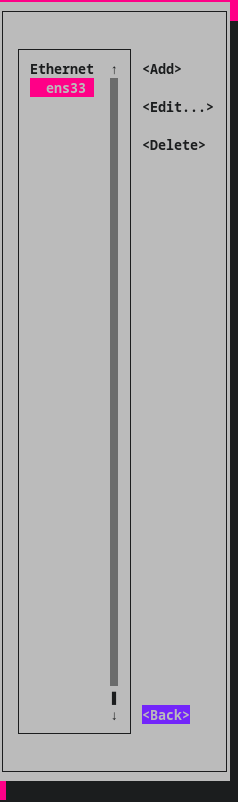
Here, the ethernet adapter is named ens33.
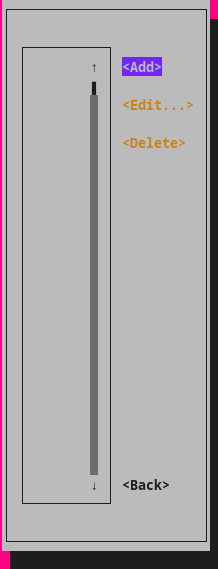
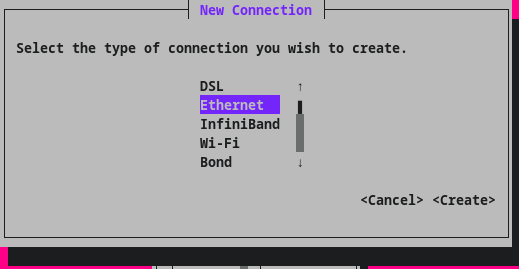
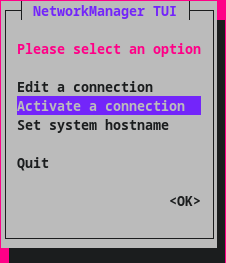
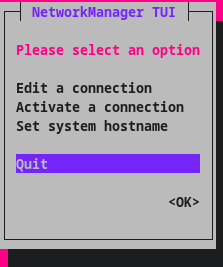
Create the Profile with nmtui .
Run the following command to launch nmtui:
ubuntu@ubuntu:~$ sudo nmtui
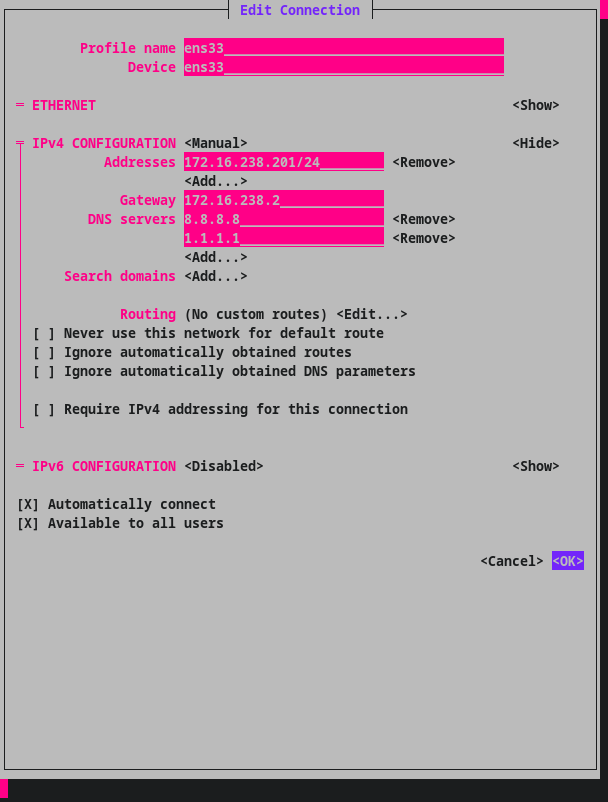
Follow the on-screen instructions to create a profile for your ethernet adapter. Configure the IP settings, gateway, and DNS as needed.

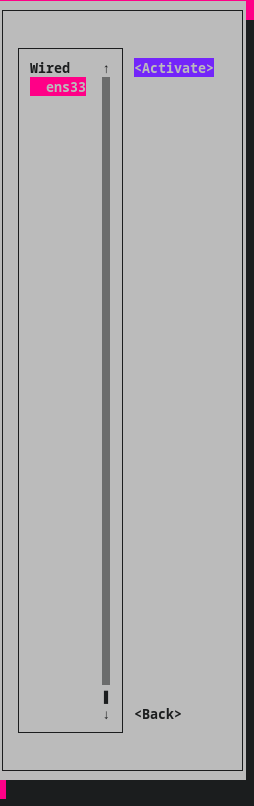
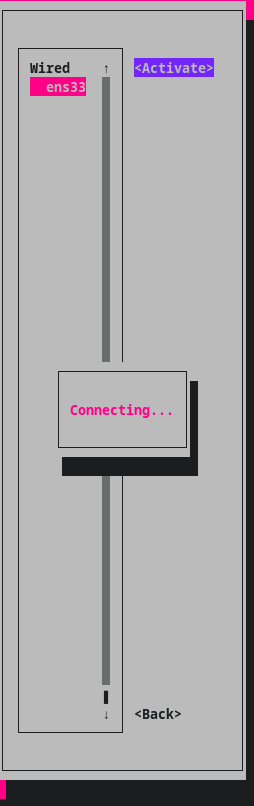
Step 4: Activate the Ethernet Card
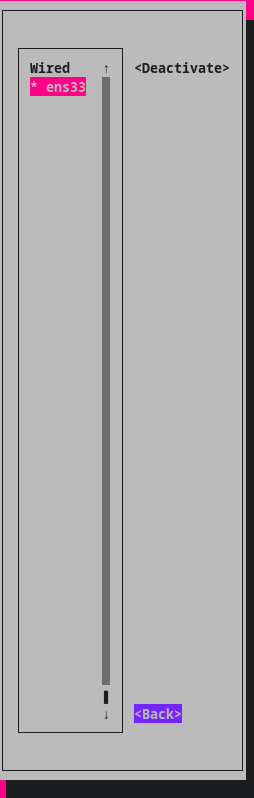
Step 5: Verify the Network Configuration
Check if your ethernet adapter is active and configured correctly:
ubuntu@ubuntu:~$ ip a
1: lo: <LOOPBACK,UP,LOWER_UP> mtu 65536 qdisc noqueue state UNKNOWN group default qlen 1000
    link/loopback 00:00:00:00:00:00 brd 00:00:00:00:00:00
    inet 127.0.0.1/8 scope host lo
       valid_lft forever preferred_lft forever
    inet6 ::1/128 scope host
       valid_lft forever preferred_lft forever
2: ens33: <BROADCAST,MULTICAST,UP,LOWER_UP> mtu 1500 qdisc fq_codel state UP group default qlen 1000
    link/ether 00:0c:29:c6:78:5c brd ff:ff:ff:ff:ff:ff
    altname enp2s1
    inet 172.16.238.201/24 brd 172.16.238.255 scope global noprefixroute ens33
       valid_lft forever preferred_lft forever
Step 6: Verify the Configuration File
The default network configuration file for Netplan is located at /etc/netplan/00-installer-config.yaml. After switching to NetworkManager, the new configuration file will be located at /etc/NetworkManager/system-connections/ens33.nmconnection.
You can view the file using:
ubuntu@ubuntu:~$ sudo nano /etc/NetworkManager/system connections/ens33.nmconnection
[connection]
id=ens33
uuid=873b64da-a866-4842-b8b4-6c6fced4fdfc
type=ethernet
interface-name=ens33

[ethernet]

[ipv4]
address1=172.16.238.201/24,172.16.238.2
dns=8.8.8.8;1.1.1.1;
method=manual

[ipv6]
addr-gen-mode=stable-privacy
method=disabled

[proxy]
This is what we want to see.
Step 7: Remove Netplan
To avoid potential conflicts, remove Netplan from your system and reboot:
ubuntu@ubuntu:~$ sudo apt remove netplan.io -y
ubuntu@ubuntu:~$ reboot
Step 8: Confirm NetworkManager is Running
After rebooting, verify that the NetworkManager service is active:
ubuntu@ubuntu:~$ systemctl status NetworkManager

● NetworkManager.service - Network Manager
     Loaded: loaded (/lib/systemd/system/NetworkManager.service; enabled; vendor preset: enabled)
     Active: active (running) since Fri 2025-01-24 20:18:10 UTC; 3min 28s ago
       Docs: man:NetworkManager(8)
   Main PID: 766 (NetworkManager)
      Tasks: 3 (limit: 2182)
     Memory: 9.0M
        CPU: 72ms
     CGroup: /system.slice/NetworkManager.service
             └─766 /usr/sbin/NetworkManager --no-daemon
You should see an output confirming that NetworkManager is running without any issues.
Thank you for reading this article. I hope it helps you successfully switch from Netplan to NetworkManager on Ubuntu.
Keep up the good work!